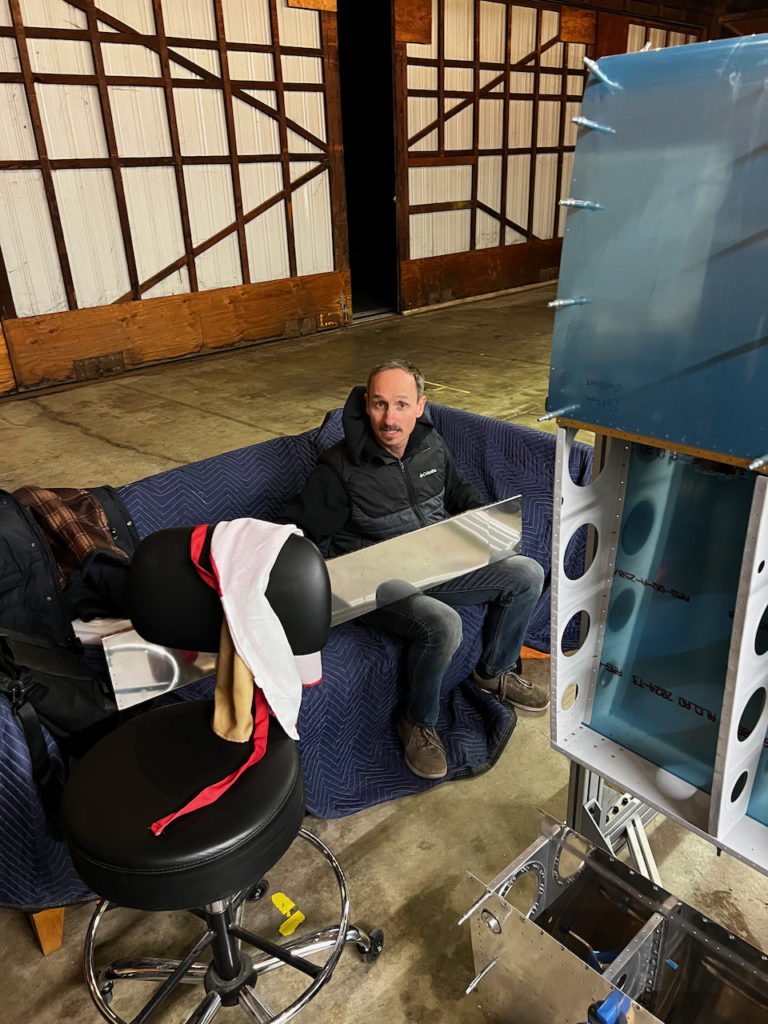
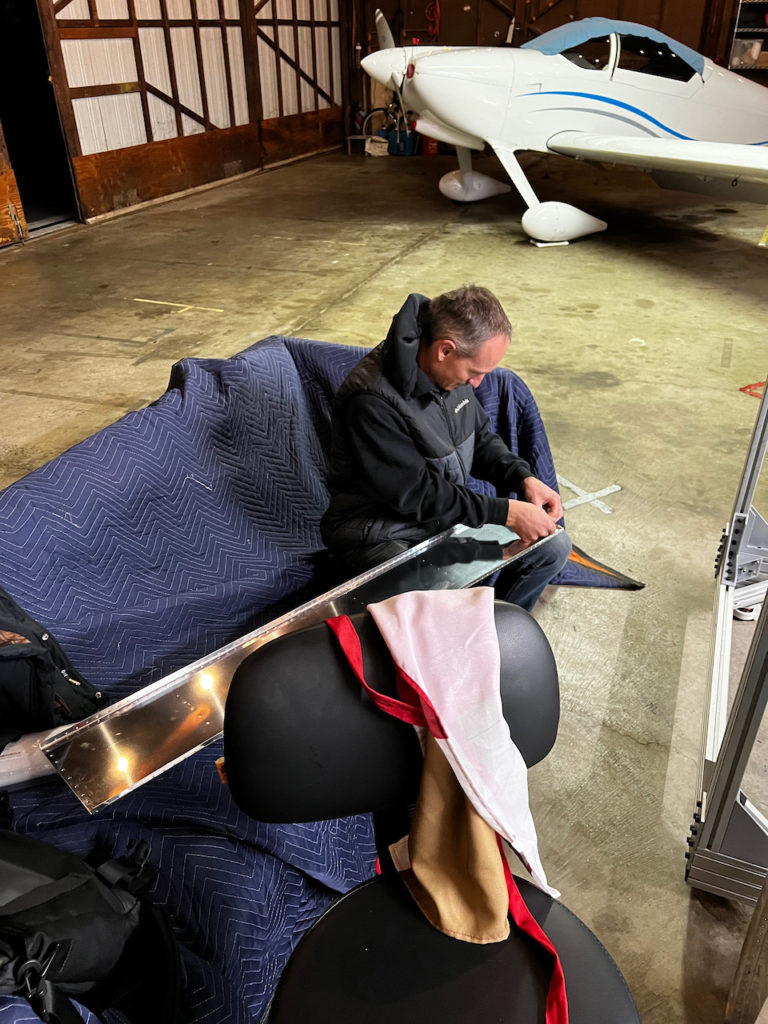
Over the past two evenings I got the final items wrapped up before the big baffle install I’ve got planned for Saturday. The two primary remaining items to complete were the fuel sender assembly and test, as well as baffle deburring and prep. Thorsten, one of my hangar neighbors, was around and decided to help out for a couple of hours so we were able to split tasks! He dutifully deburred a ton of holes in the baffle and scotchbrite’d the interior lines where the rear rib flanges will attach. Thanks for the help Thorsten!
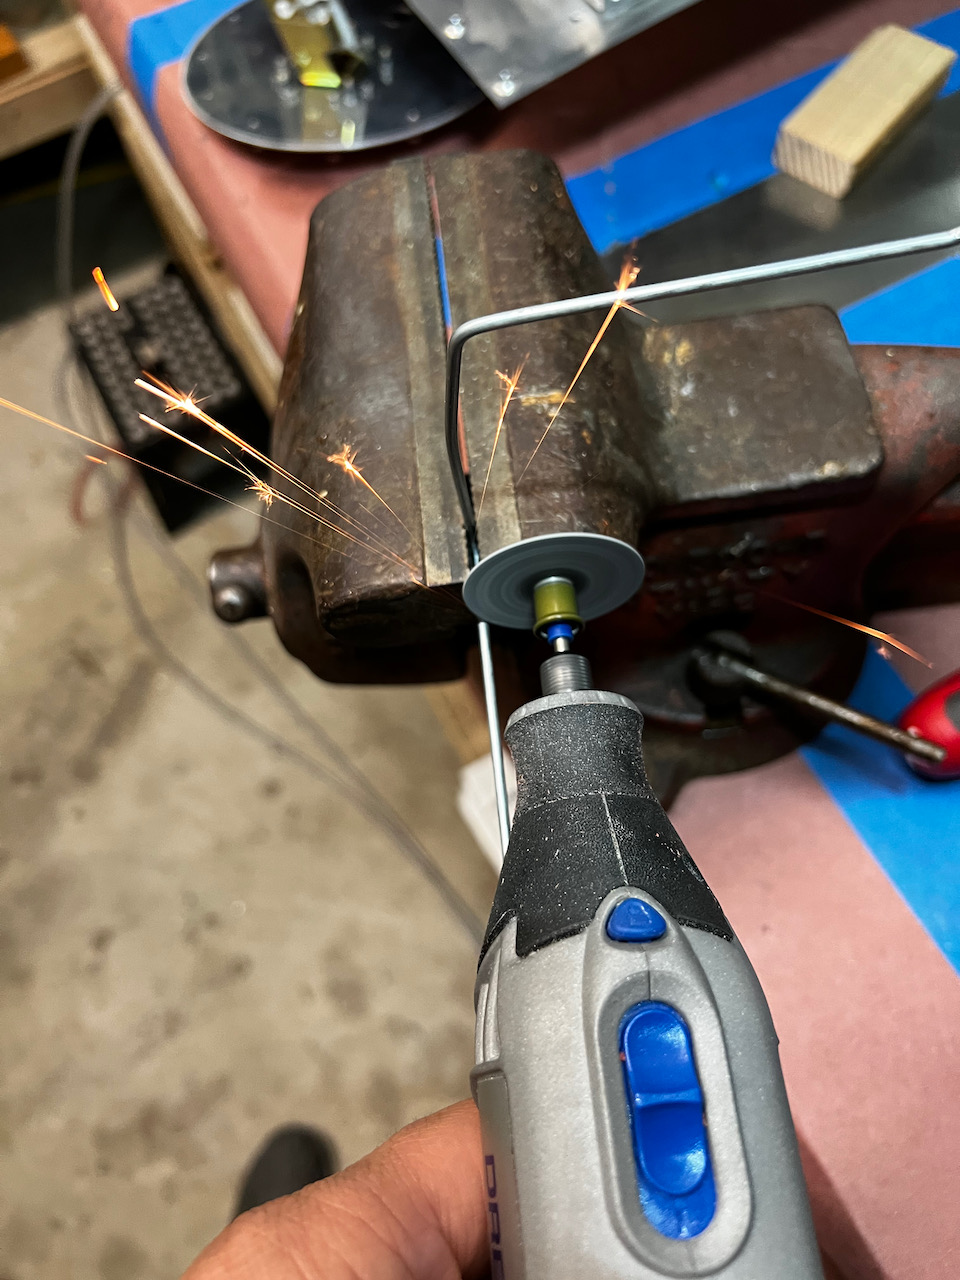
Meanwhile, I focused on the fuel sender unit (over yesterday and today). After installing the nutplates and testing fit and function, I had to shape and cut down the fuel sender float wire so that I cover as much of the tank (top to bottom) as I could. Using the recommended lengths from Vans I got a pretty good range (3″ in both directions). Then I used a multimeter to confirm that the unit was showing the expected resistances across the range of positions.
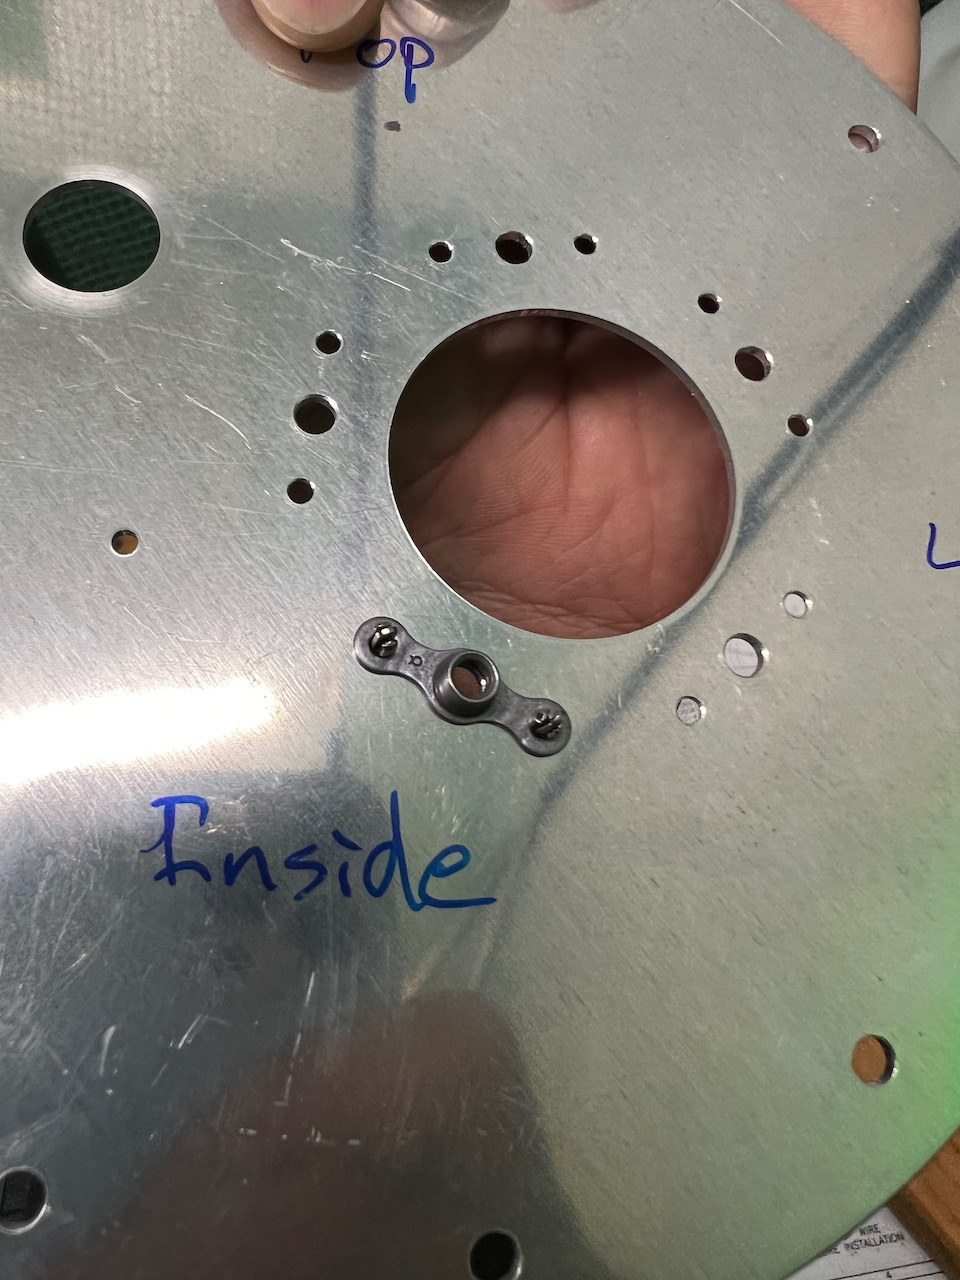
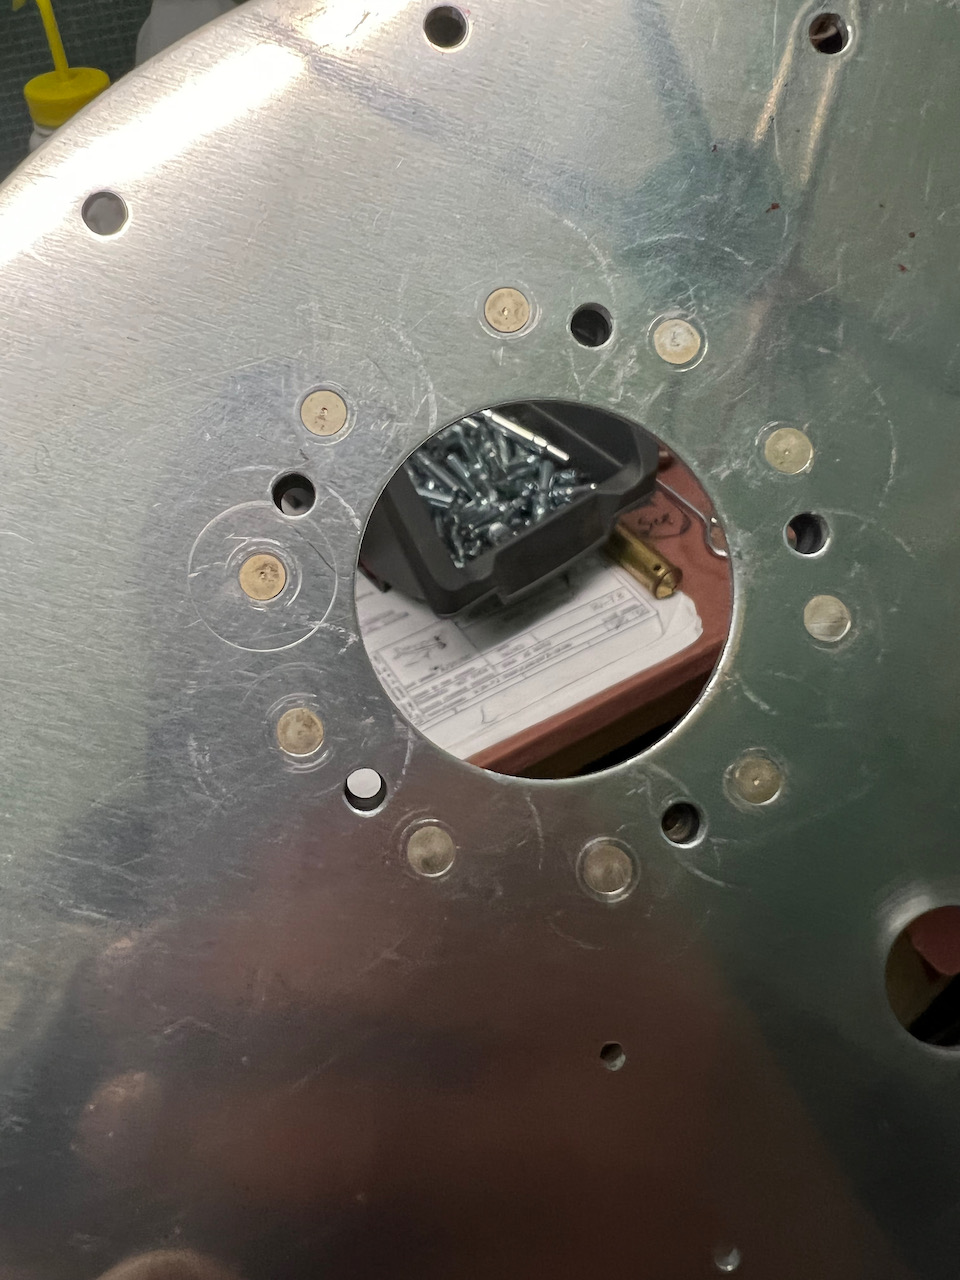
countersinking for nut plates
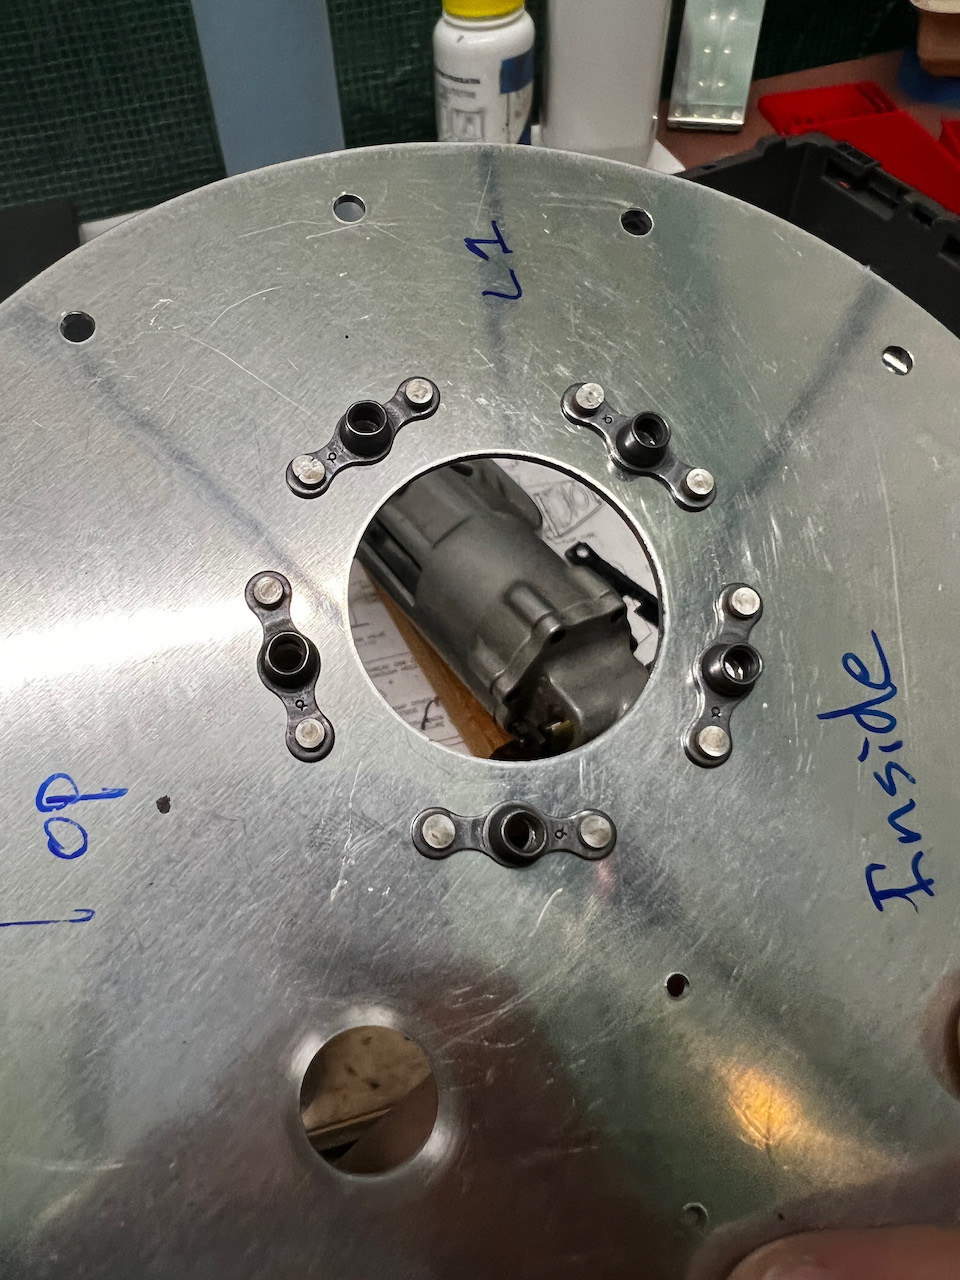
and installing nut plates
This small thin nose 2″ yoke is great for some of the really hard to get to locations
It fits through some pretty tight spots!
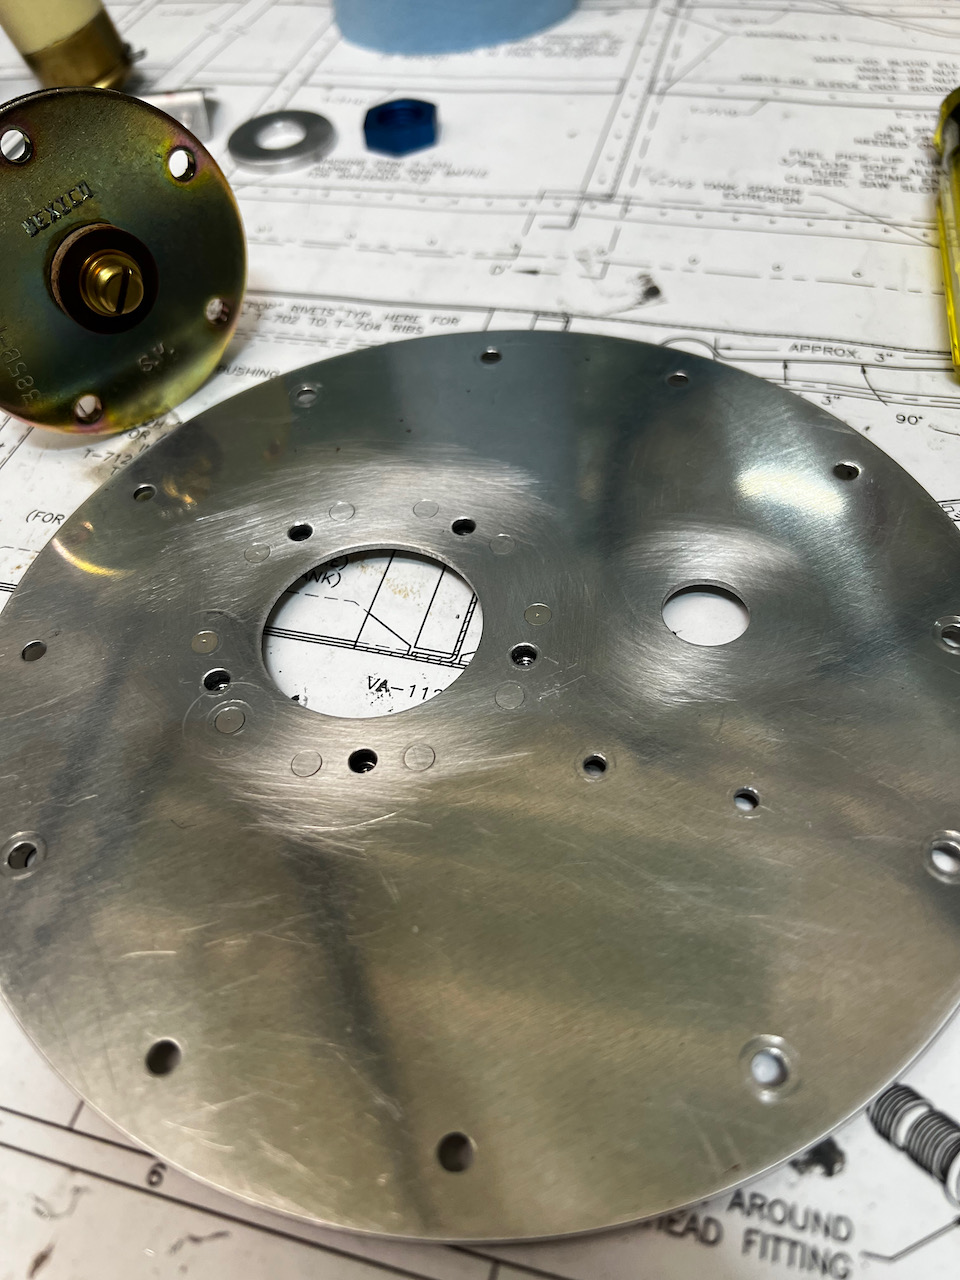
nut plate surface looks great!
and ready to receive the fuel sender unit
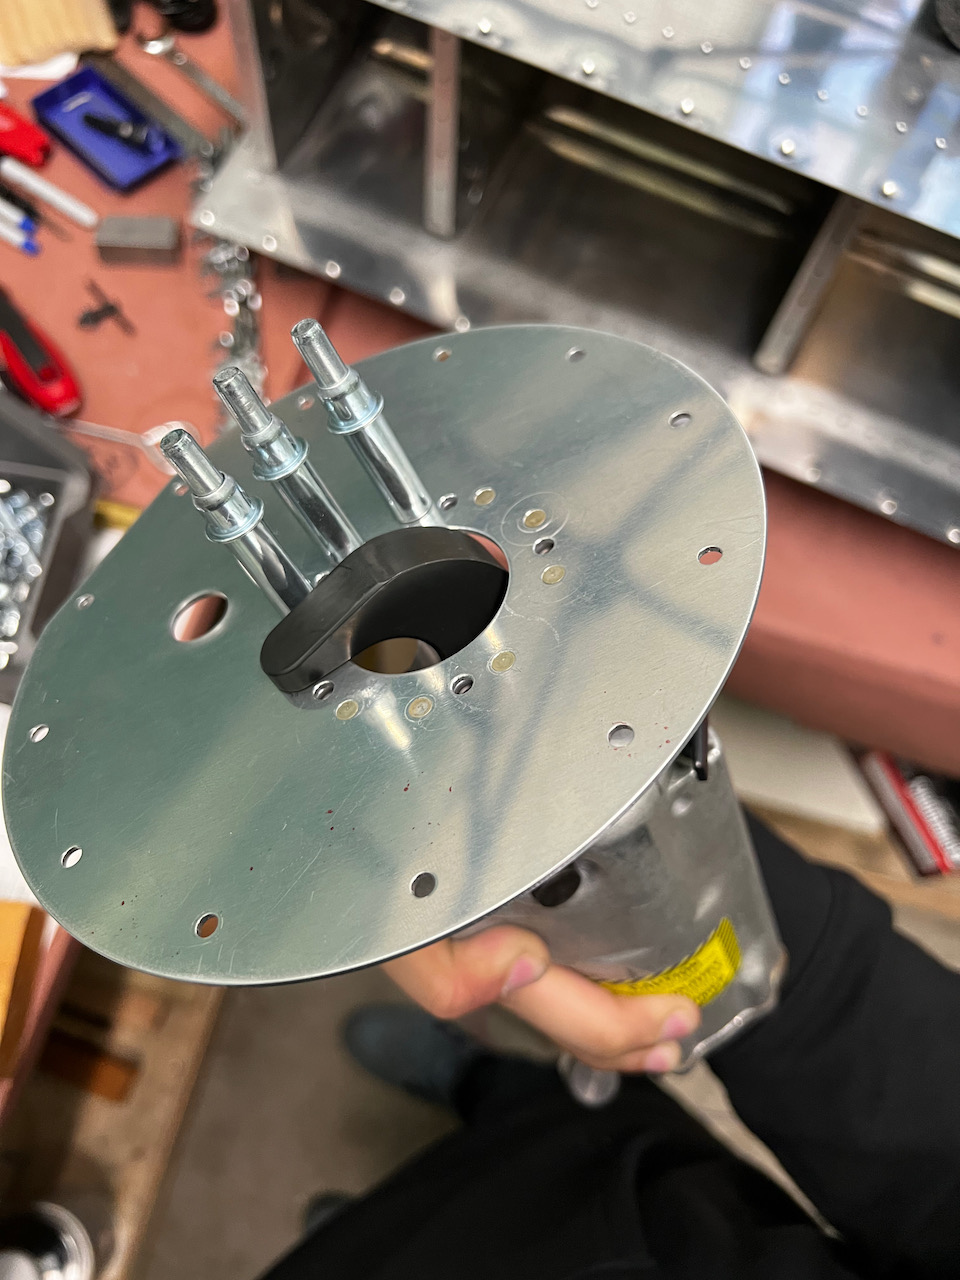
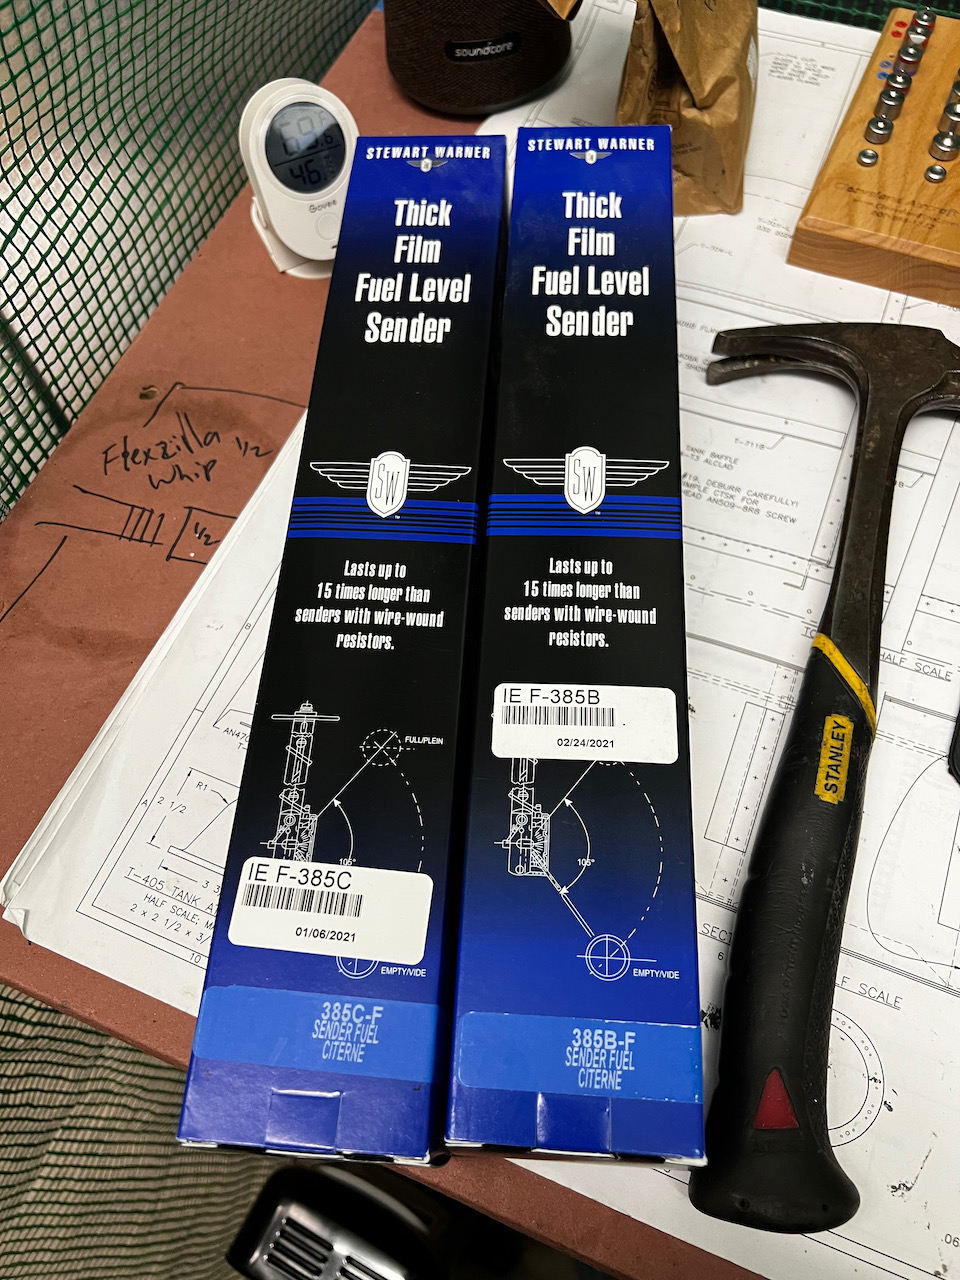
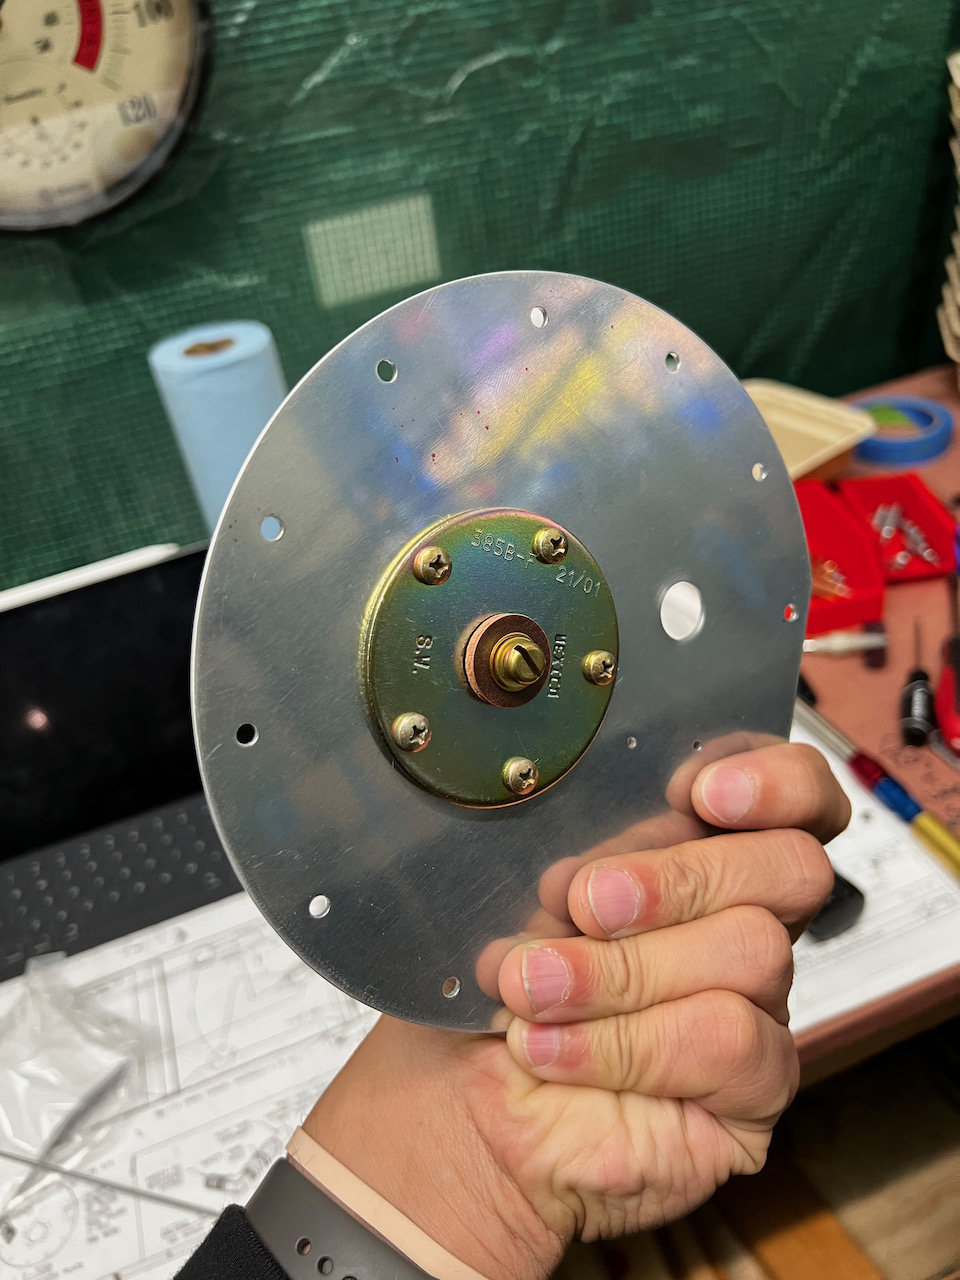
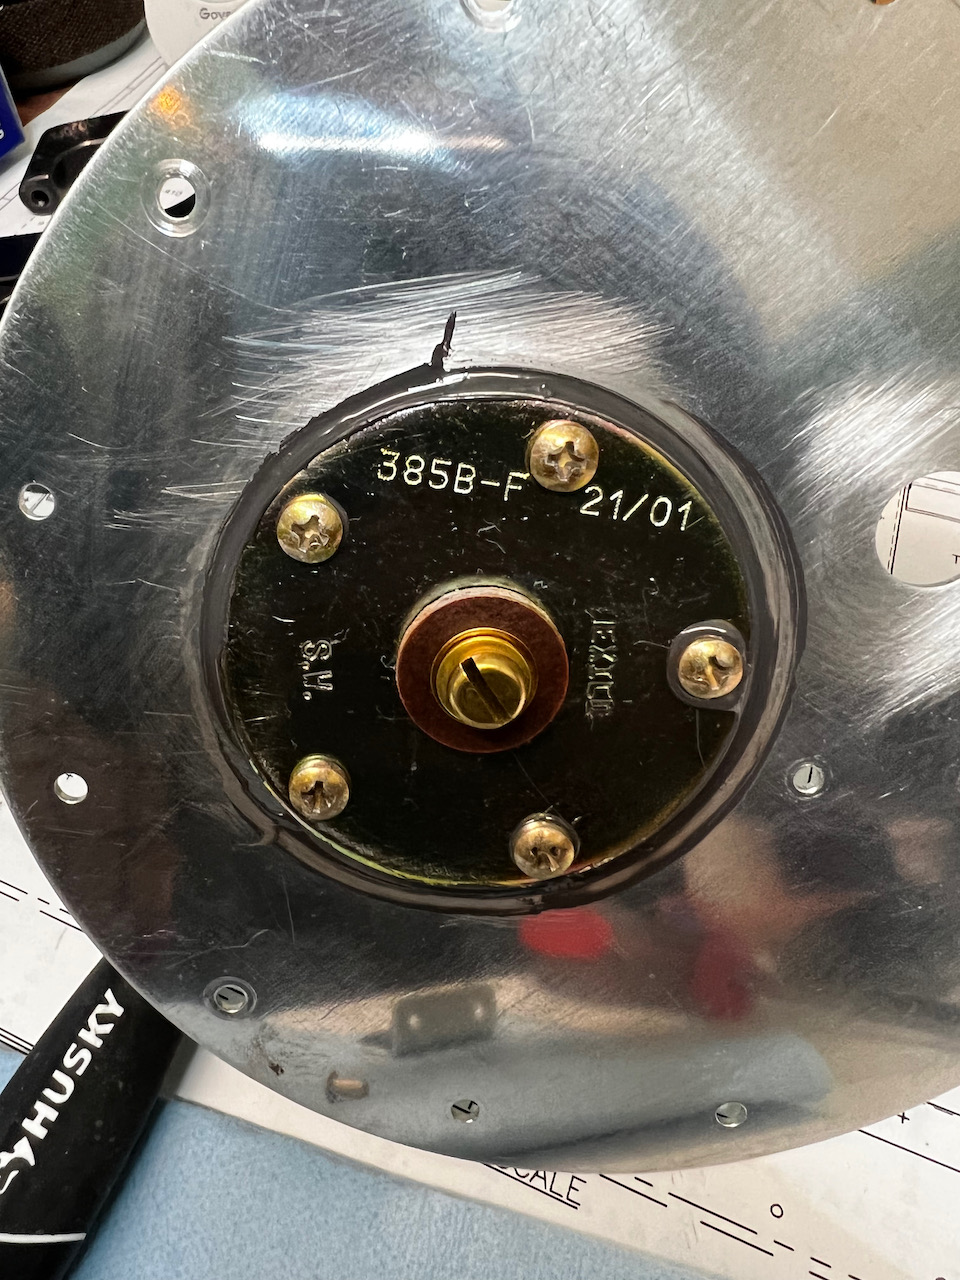
Stewart Warner Fuel sender units
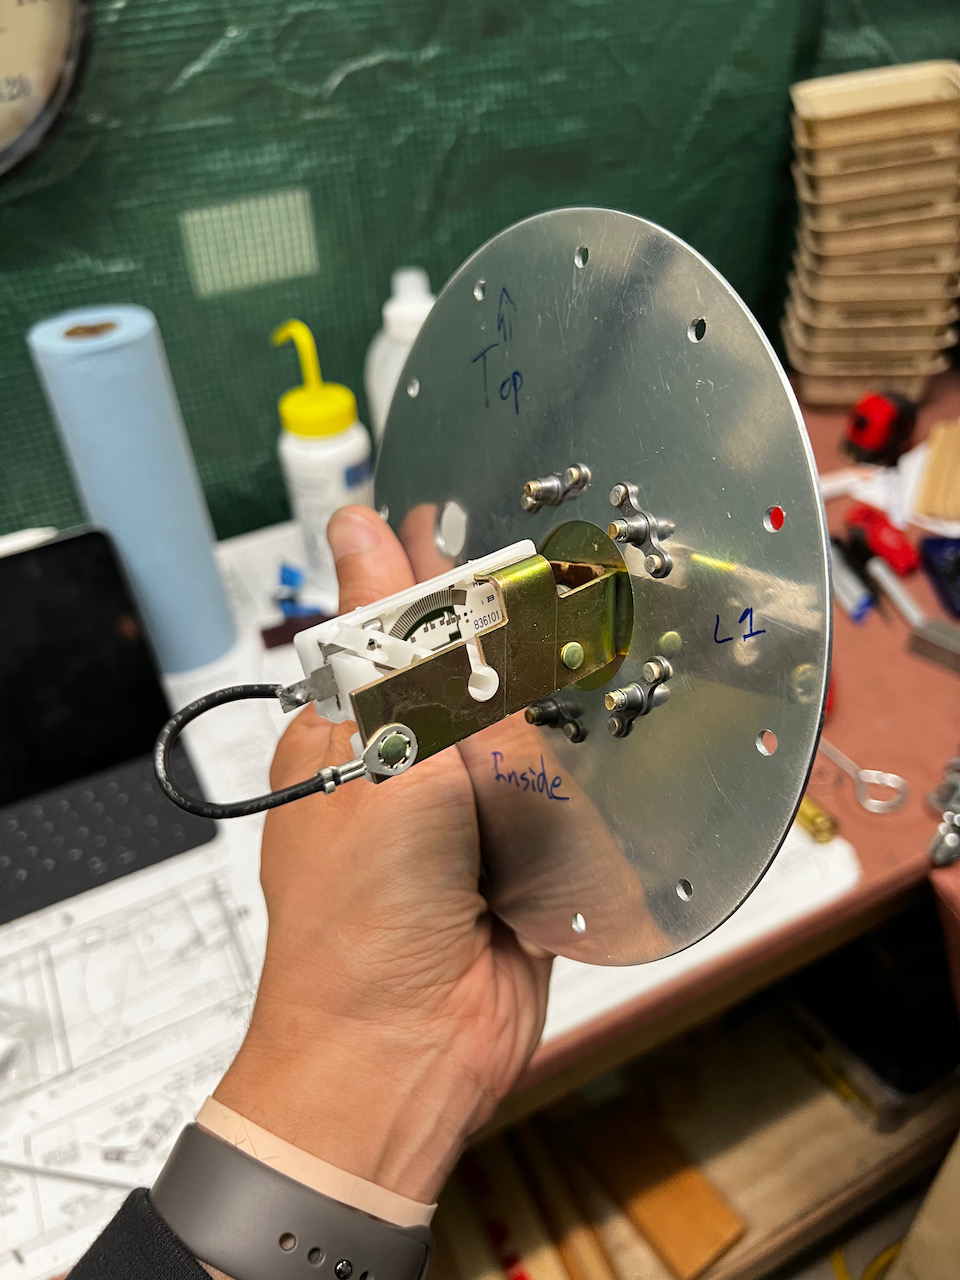
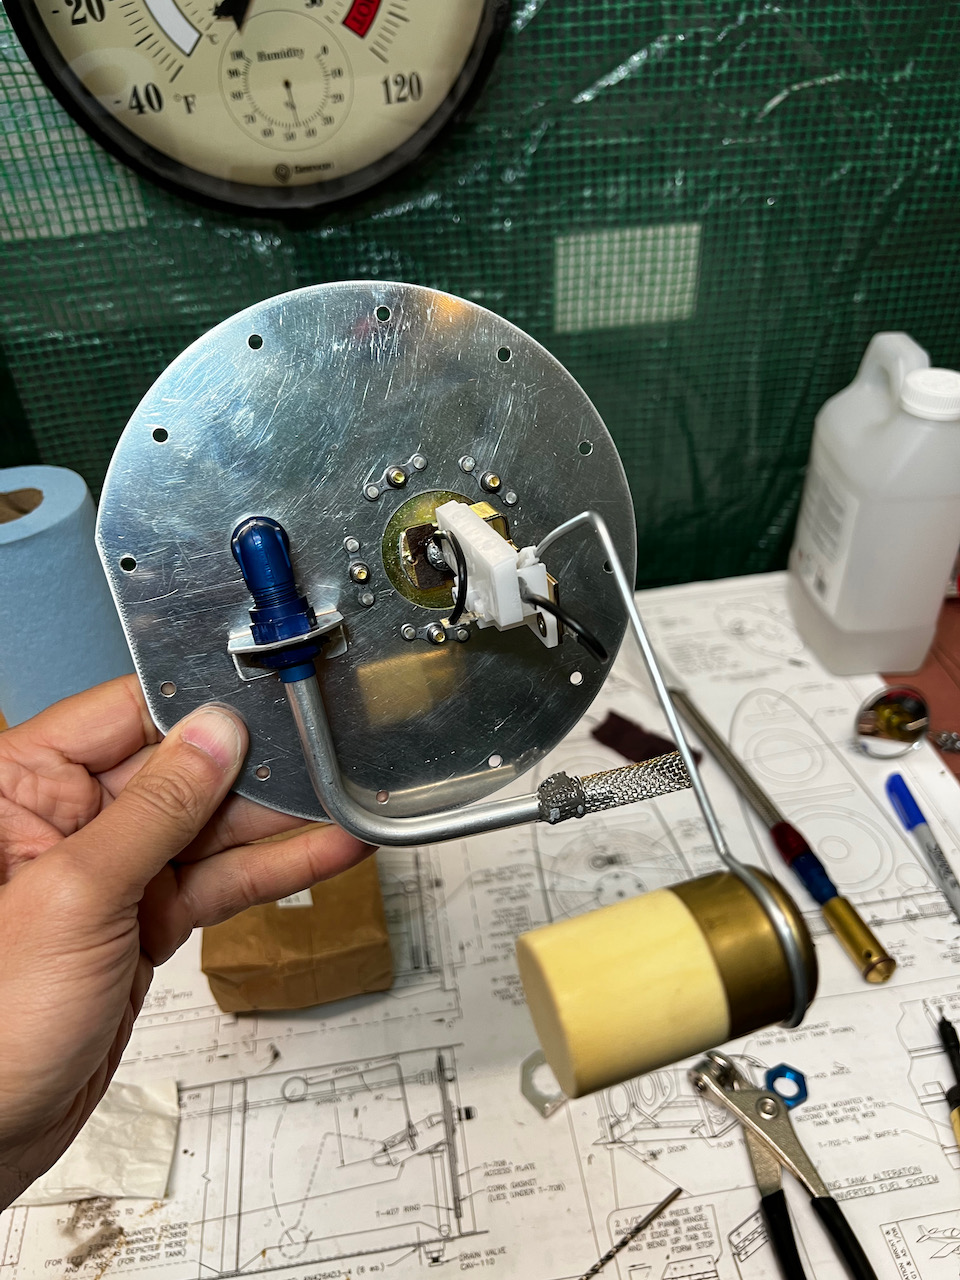
Test fit of sender unit looks good!
and outside view of the unit
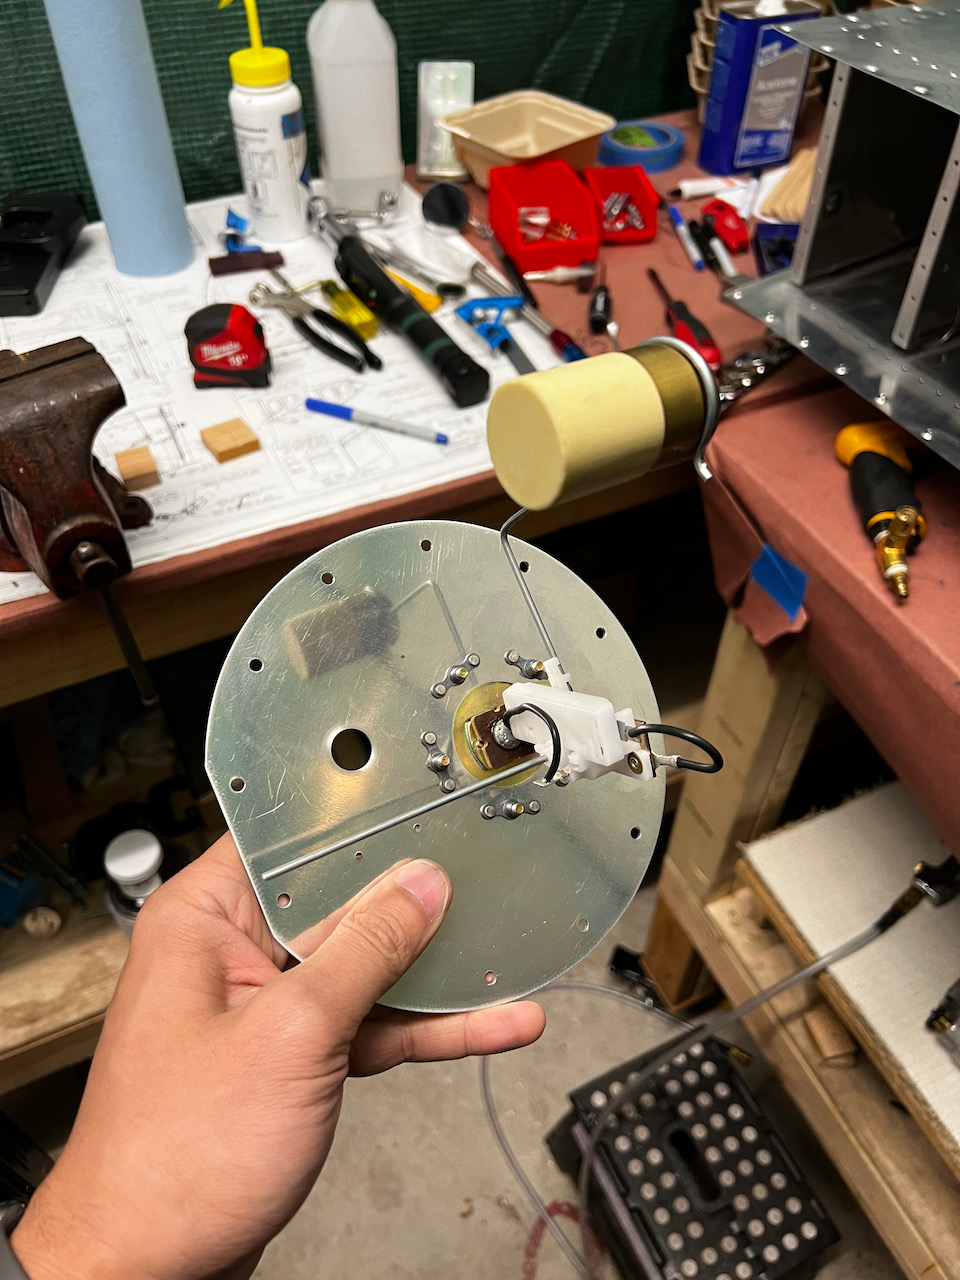
Float wire bent and test fit within unit
clearances with tank worked pretty well!
Test shows expected resistances
final cut of the float wire
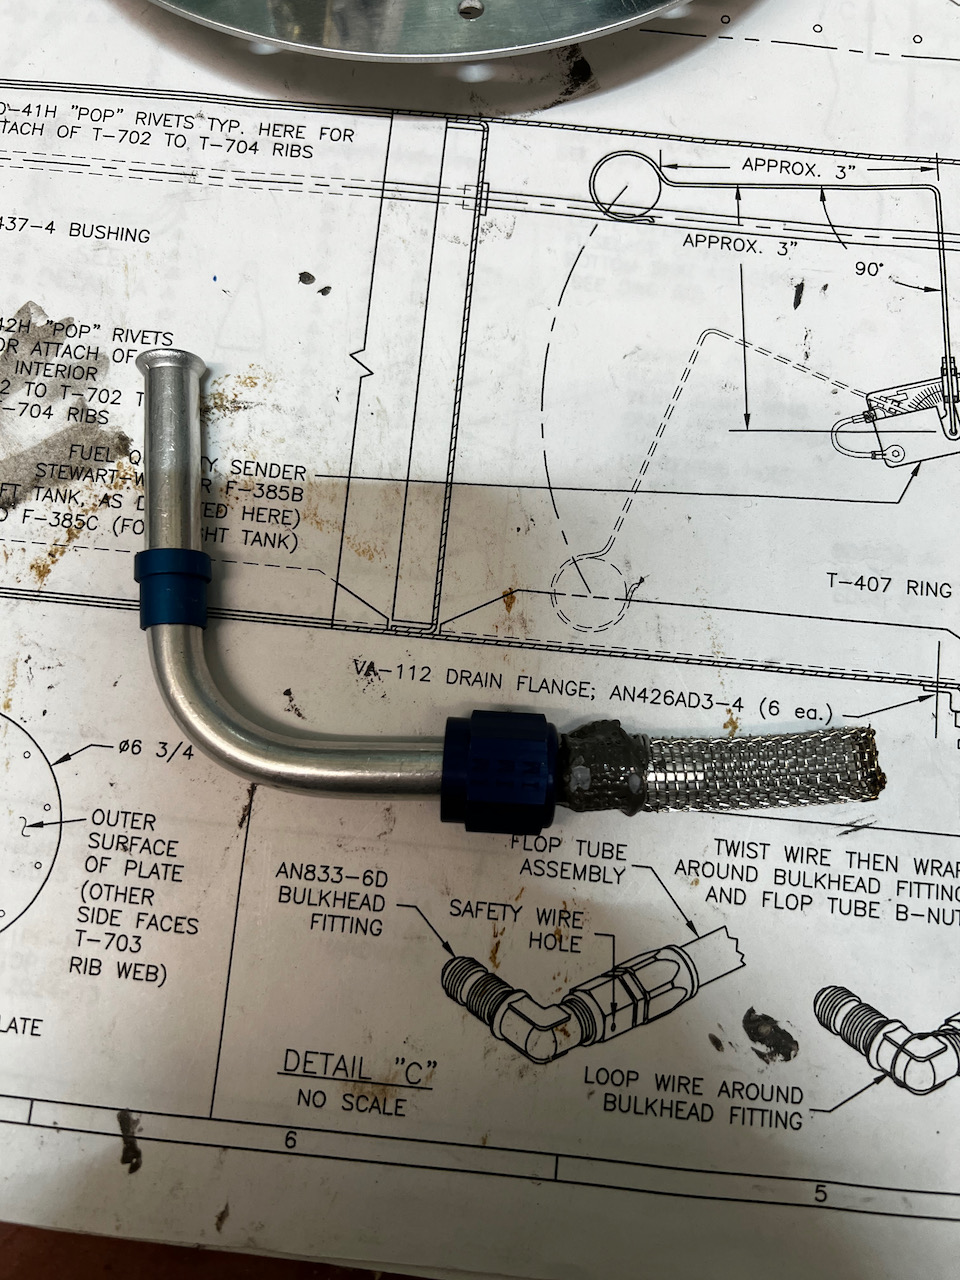
Next up I needed to test fit the fuel pick up line. I opt’d for getting the pre-made fuel pickup line from Vans. It was great to avoid the fabrication effort for this basic piece. The quality was good, and the fit was ideal. After the test fit I scotchbrite’d and cleaned all surfaces that may require sealant. Being done with the prep, Thorsten and I took a quick break to eat some yummy Curry Up Now burritos before getting to the final assembly.
pre-made fuel pickup line from Van’s
Test fit looks good
and how it sits in the tank is perfect!
Another view
All parts preped and ready for sealant!
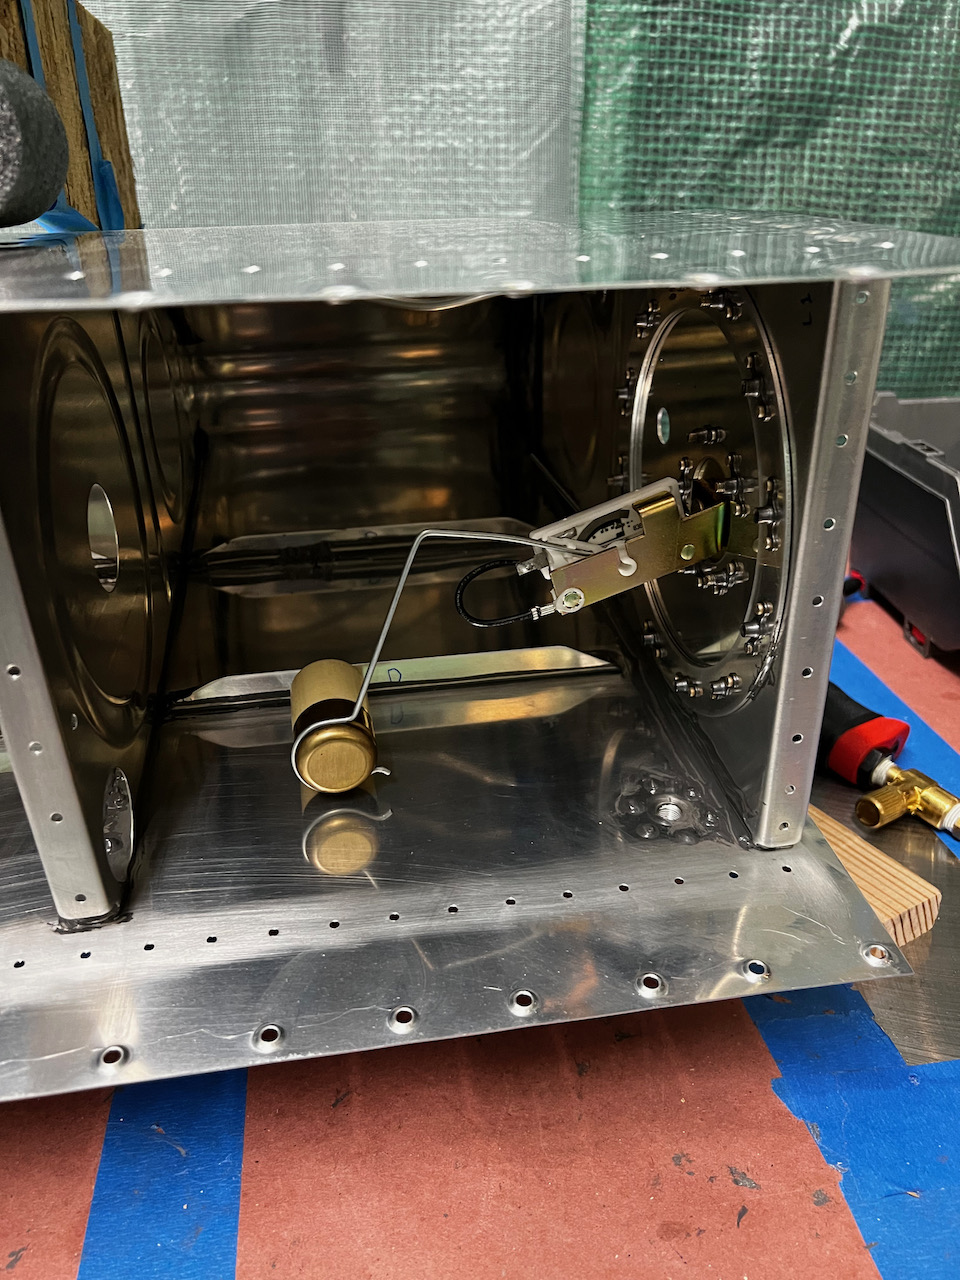
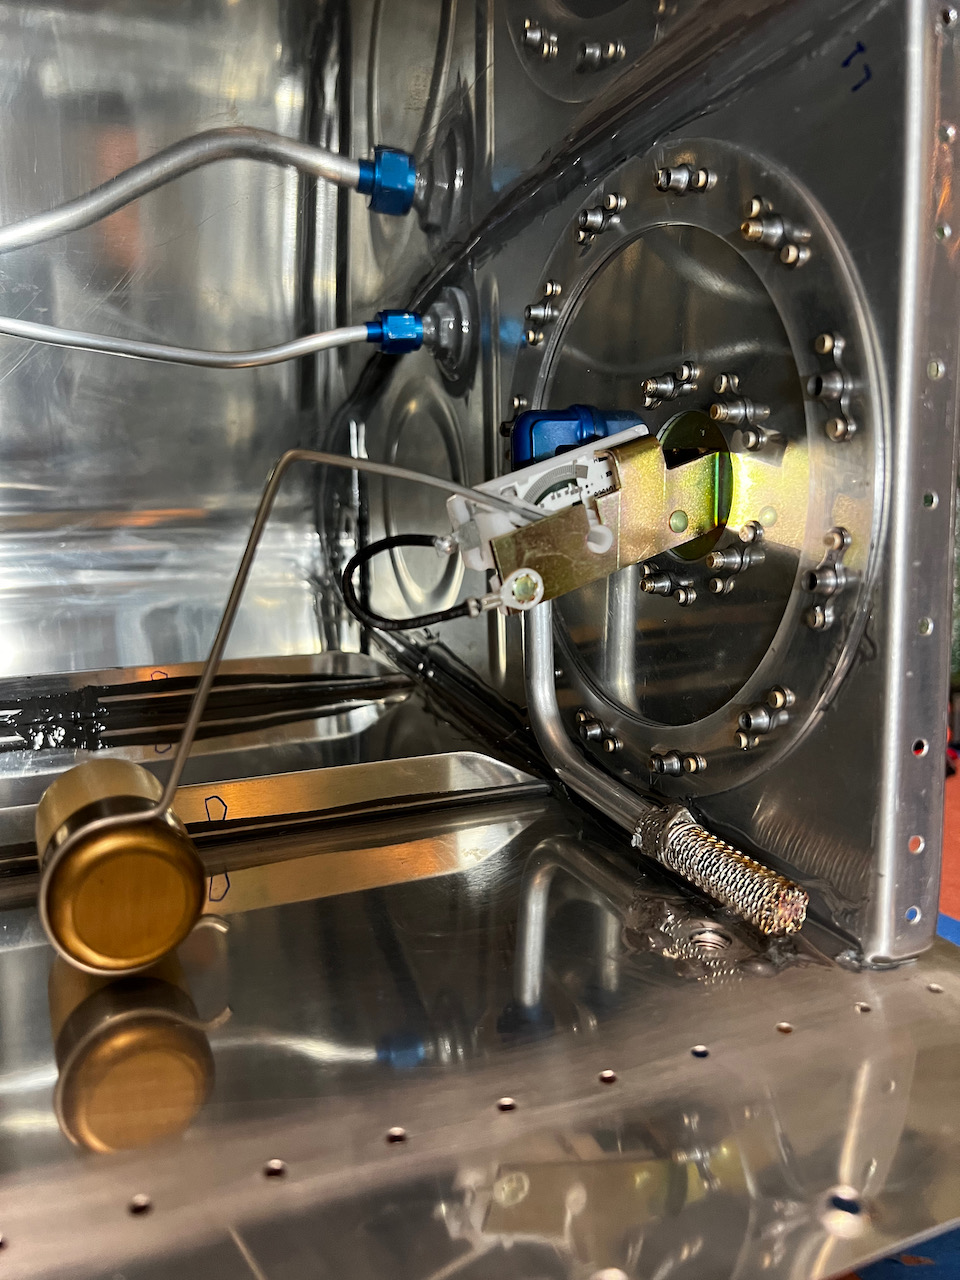
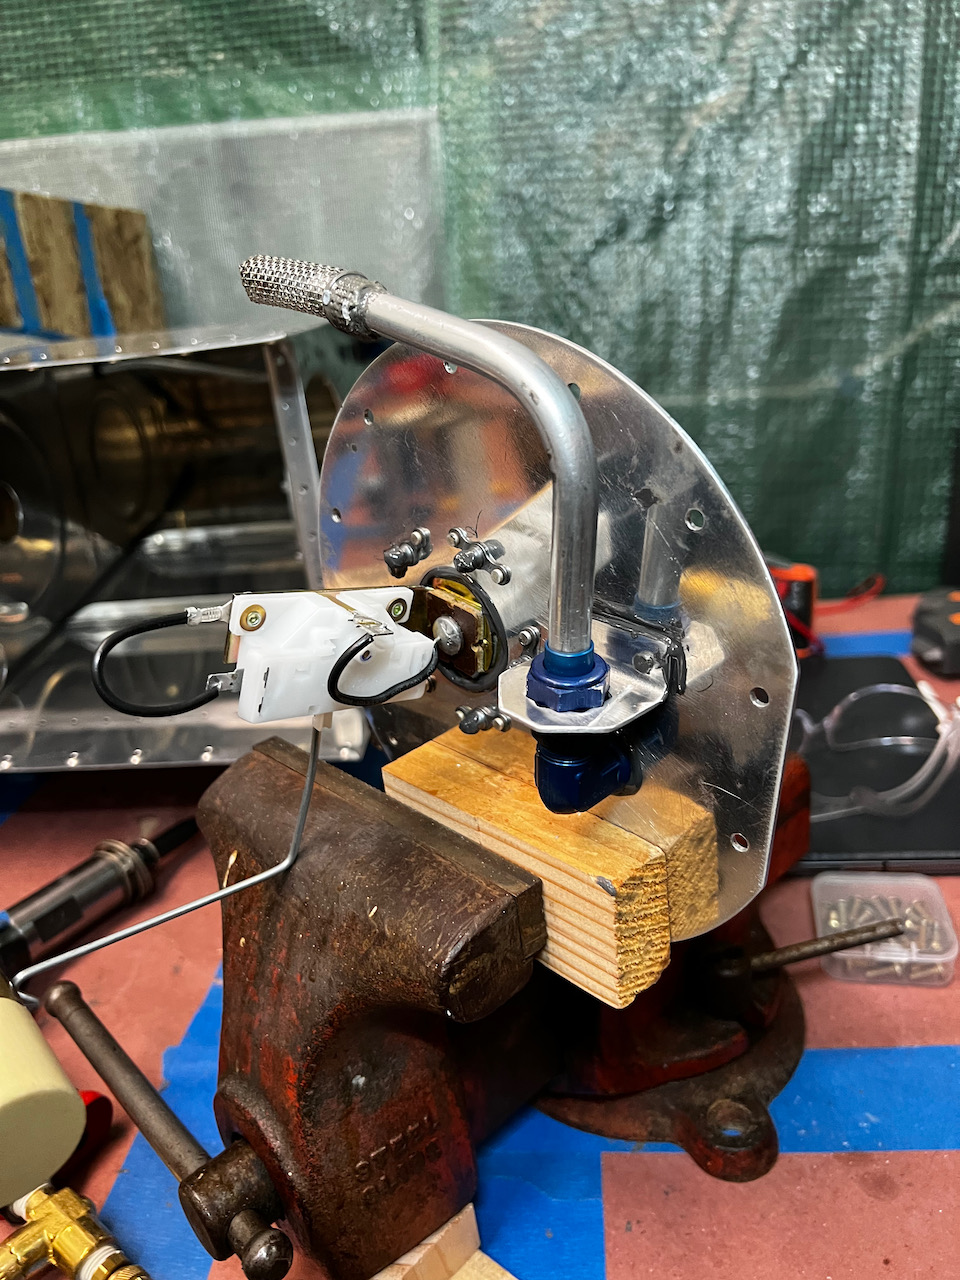
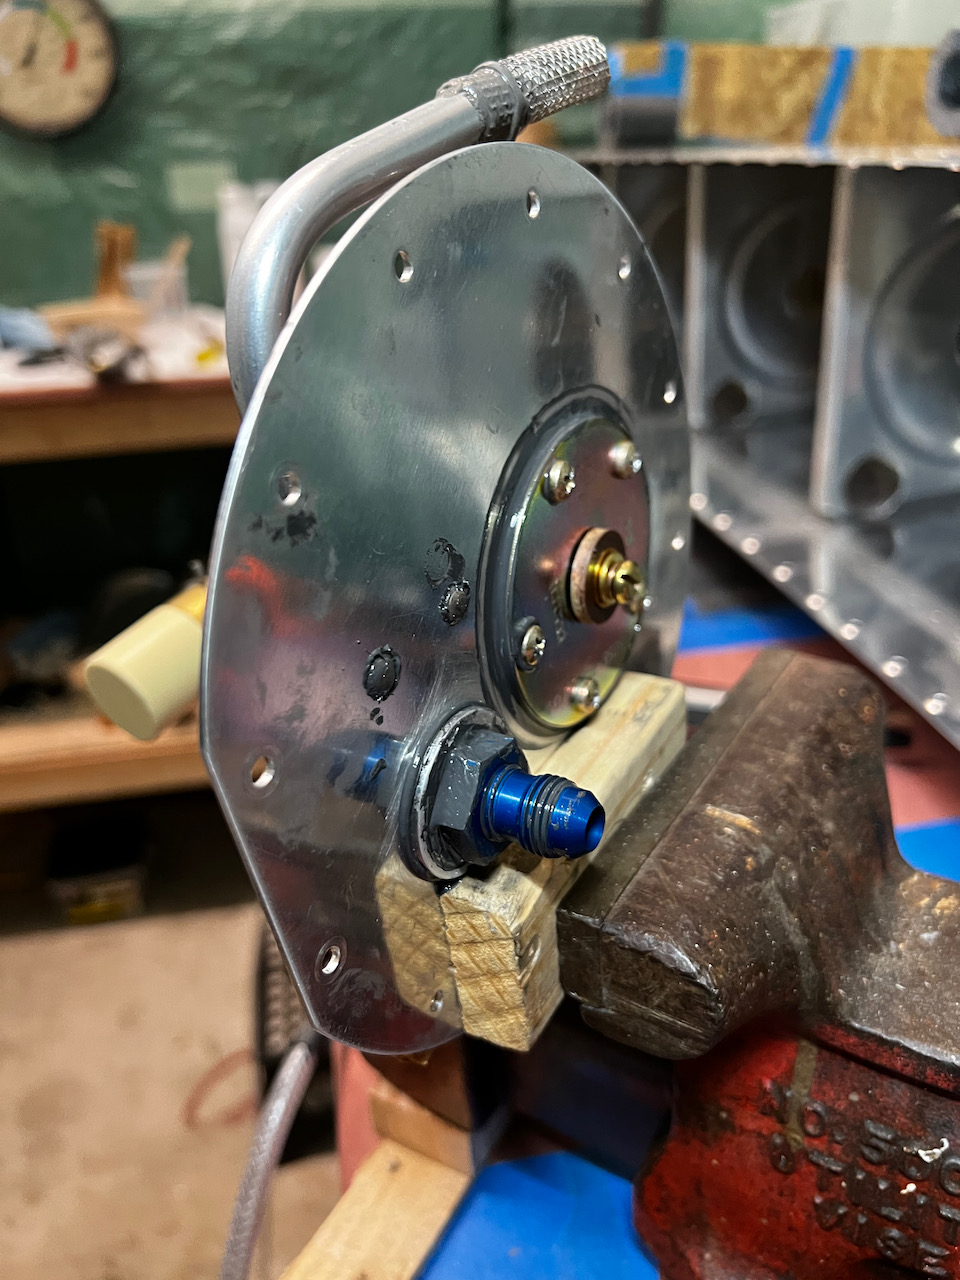
With everything prepped, I started with the fuel sender unit. I used a thin layer of sealant which also acted as the sealant over the screws. One of the big concerns I read about on the forums was ensuring that there was good grounding of the unit’s base to the rest of the airframe. There is a lot of discussion about adding an extra grounding wire, or star washers to encourage metal-to-metal contact. My conclusion based on many comments was that there are enough points of contact with the nutplates through the screws that you should end up with a good grounding path without any of the additional remedies. One of the challenges of the assembly was the rivets to hold the anti-rotation bracket. There was no easy way to squeeze these, so I had to clamp the assembly down in a vice and buck the rivets. Because of the AN833 fitting, there is very little room to get the bucking bar on the rivet. Using the vice really helped me focus on the bucking task.
Fuel sender unit sealed nicely
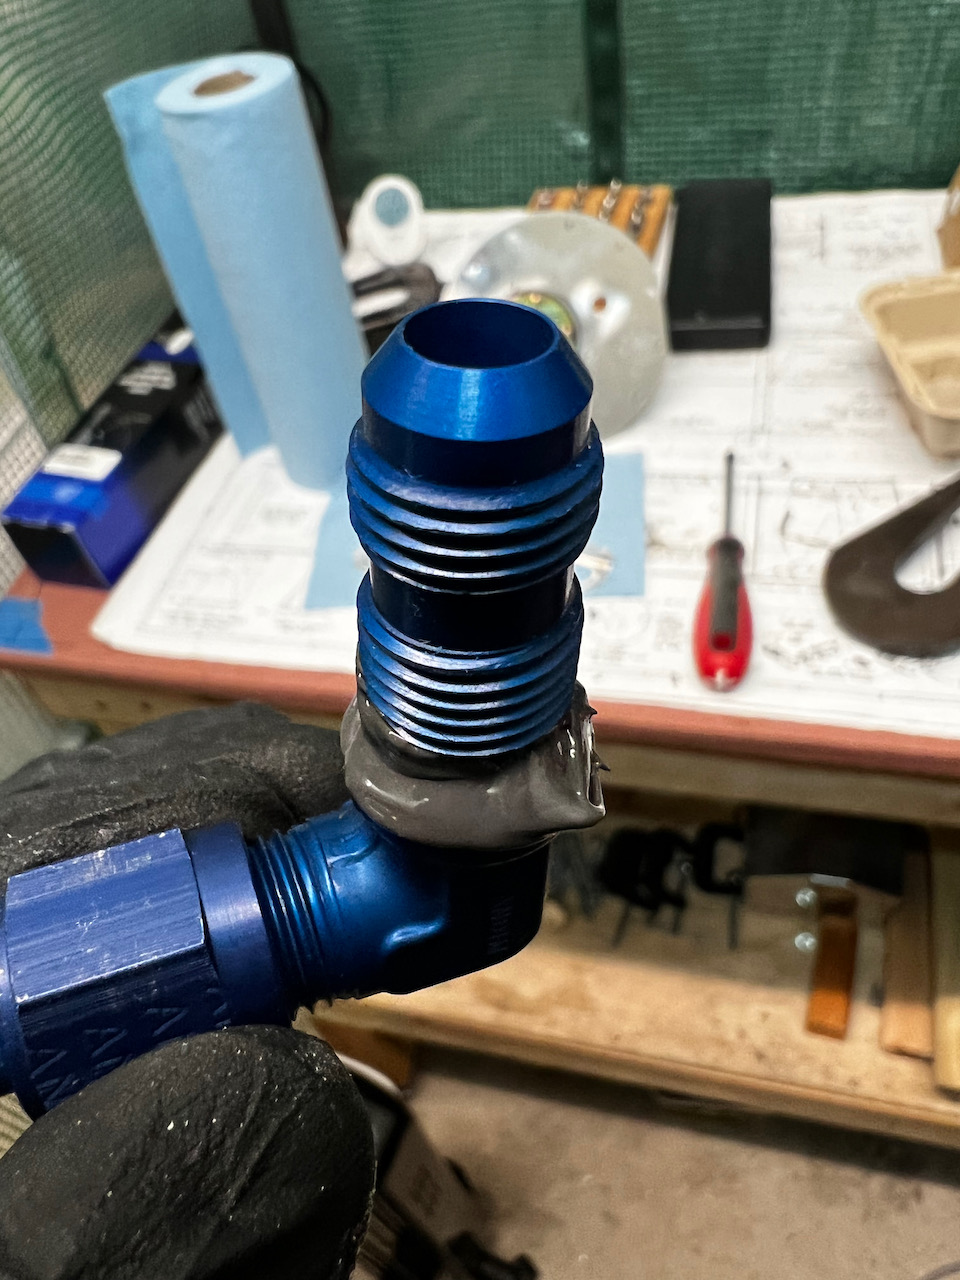
fittings require sealant as well
AN470AD4-5 rivets require bucking…
…so using the vice allowed free hands for the buck.
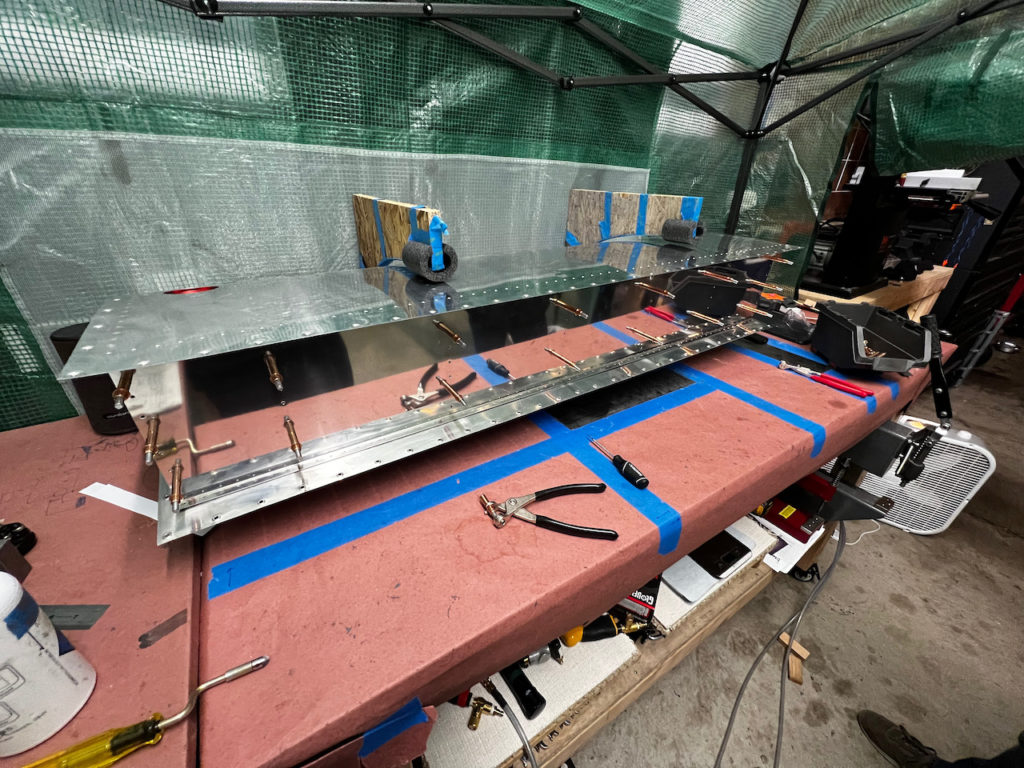
baffle fits nicely
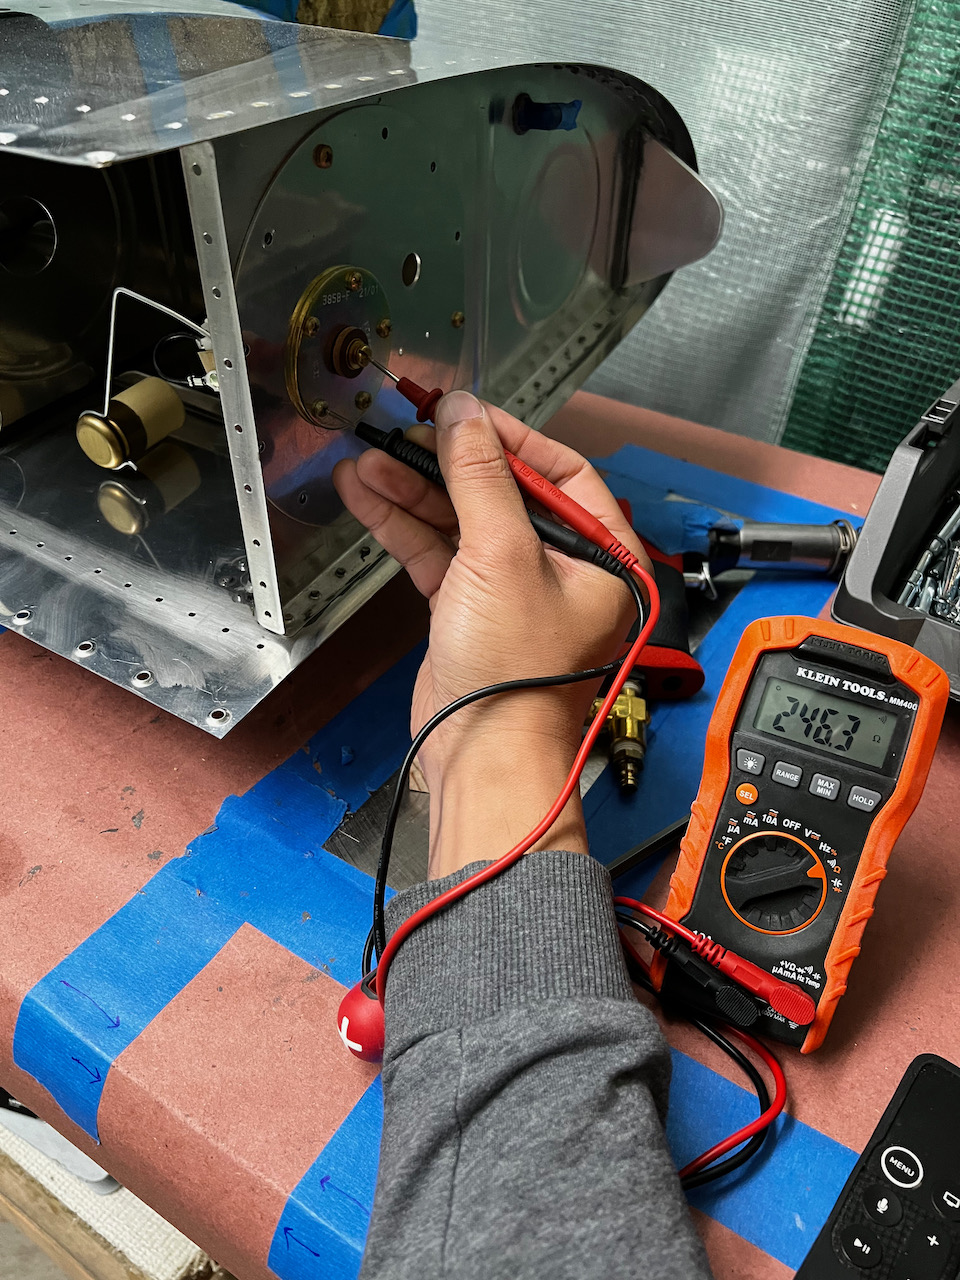
After getting everything sealed up, I rough installed the assembly into the tank and did a final resistance test. See the video below. You can see that we verified ground against the tank attach bracket along the leading edge, so it looks like ground is working well! Just for fun, I cleco’d on the baffle to see the final form.
Shiny baffle fitted for the last time!
I’m sure I’ll eat my words this weekend, but I think that I’m ready for the baffle. Vent lines in, all ribs verified for good seal, fuel sender and pickup installed and verified, baffle deburred and scuffed. That’s it! Saturday morning I will do one last cleaning before closing up the baffle! Wish me luck!! I’ll report back as soon as I’m done, but until then…. Happy Building!
Yeahhhh. Another big step. Keeping my fingers crossed for the weekend baffle challenge. Thank you to Thorsten tell him I’m looking forward to buying him a beer.


1 comment
Yeahhhh. Another big step. Keeping my fingers crossed for the weekend baffle challenge. Thank you to Thorsten tell him I’m looking forward to buying him a beer.