Let me start by cutting to the chase. From what I can tell, the session was a complete success. The techniques I had been watching in the Van’s Fuel Tank video (over and over again) worked great. And the amount of time I spent thinking about and visualizing the session kept me confident and smooth during the process. Below is a lengthy account of the session, starting with the dawn patrol beginning, through the final pictures of satisfaction. Enjoy the read!
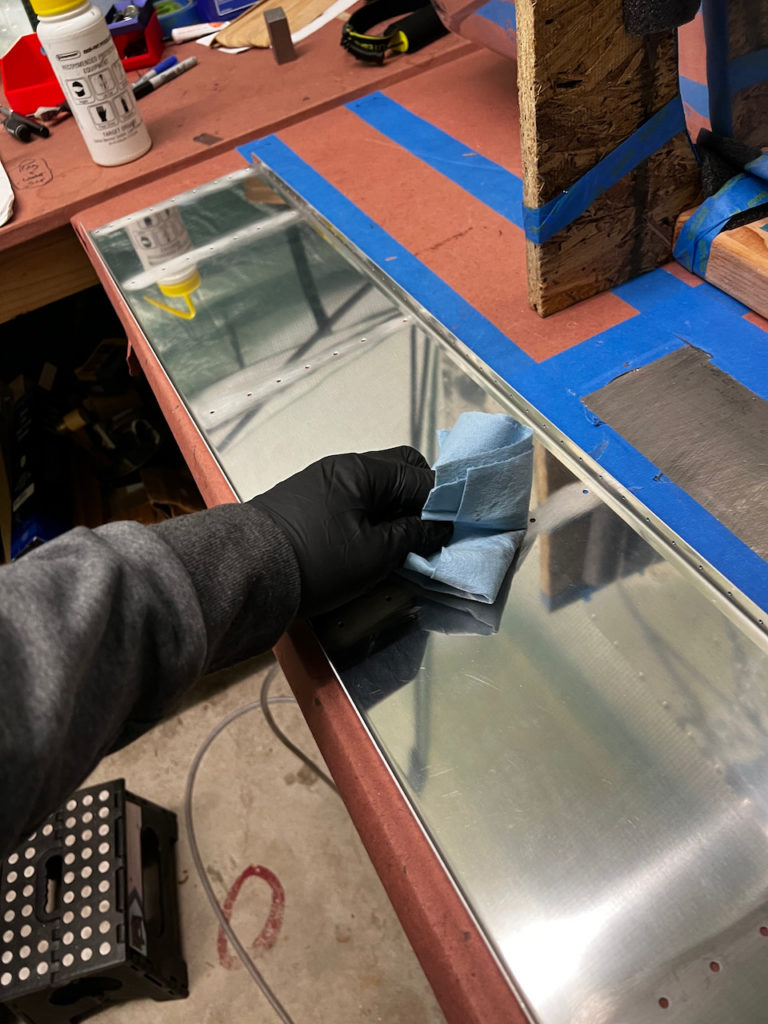
The morning started with the prep work. I had written out a checklist of items for the day (I added a couple items after this first session). I wanted to make sure I got everything in the right order. It started with a bit of scuffing on the baffle that I had missed, and then a thorough MEK wipe down and final cleaning of the interior of the tank.
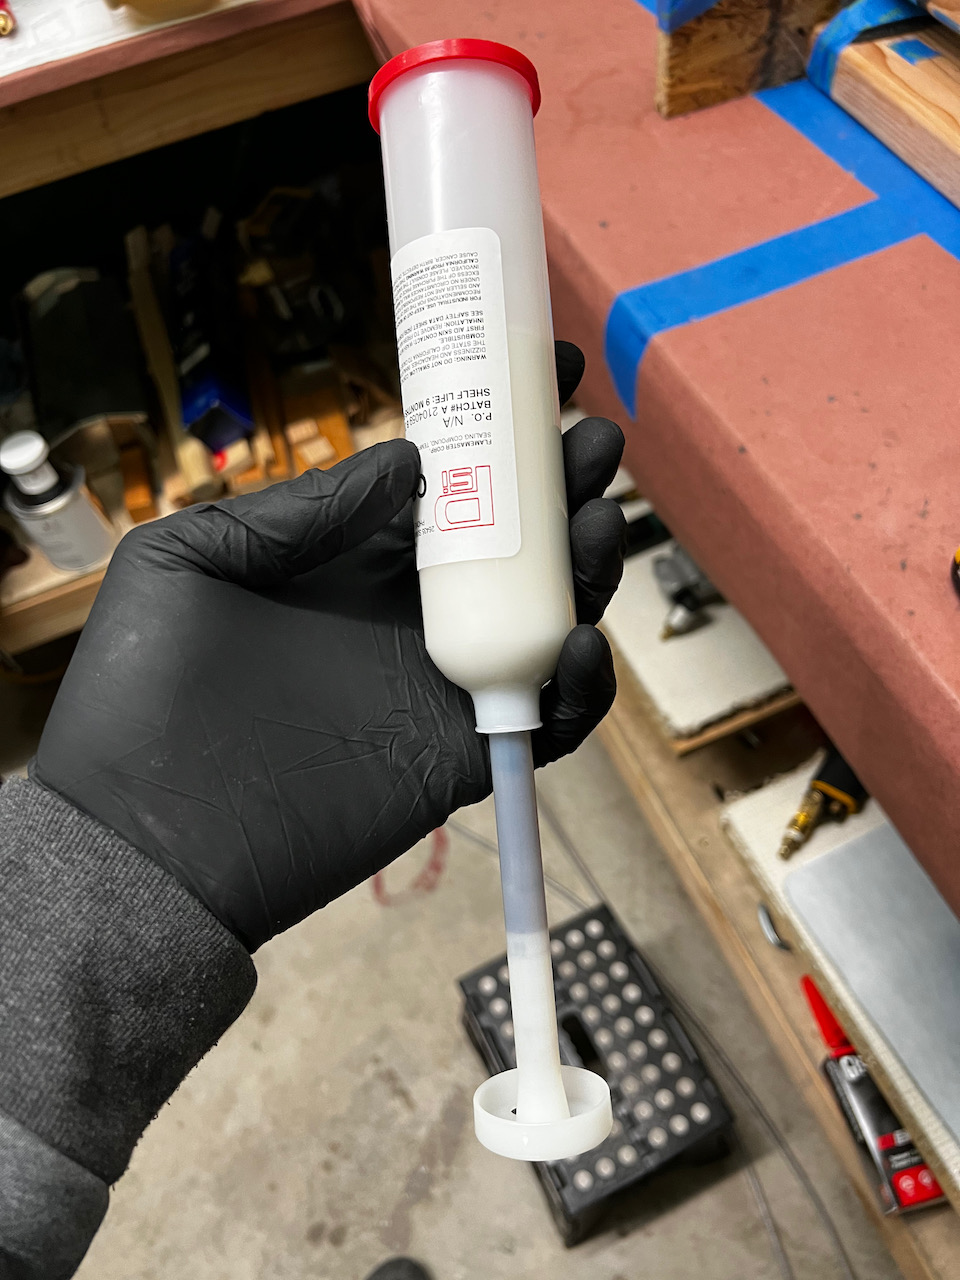
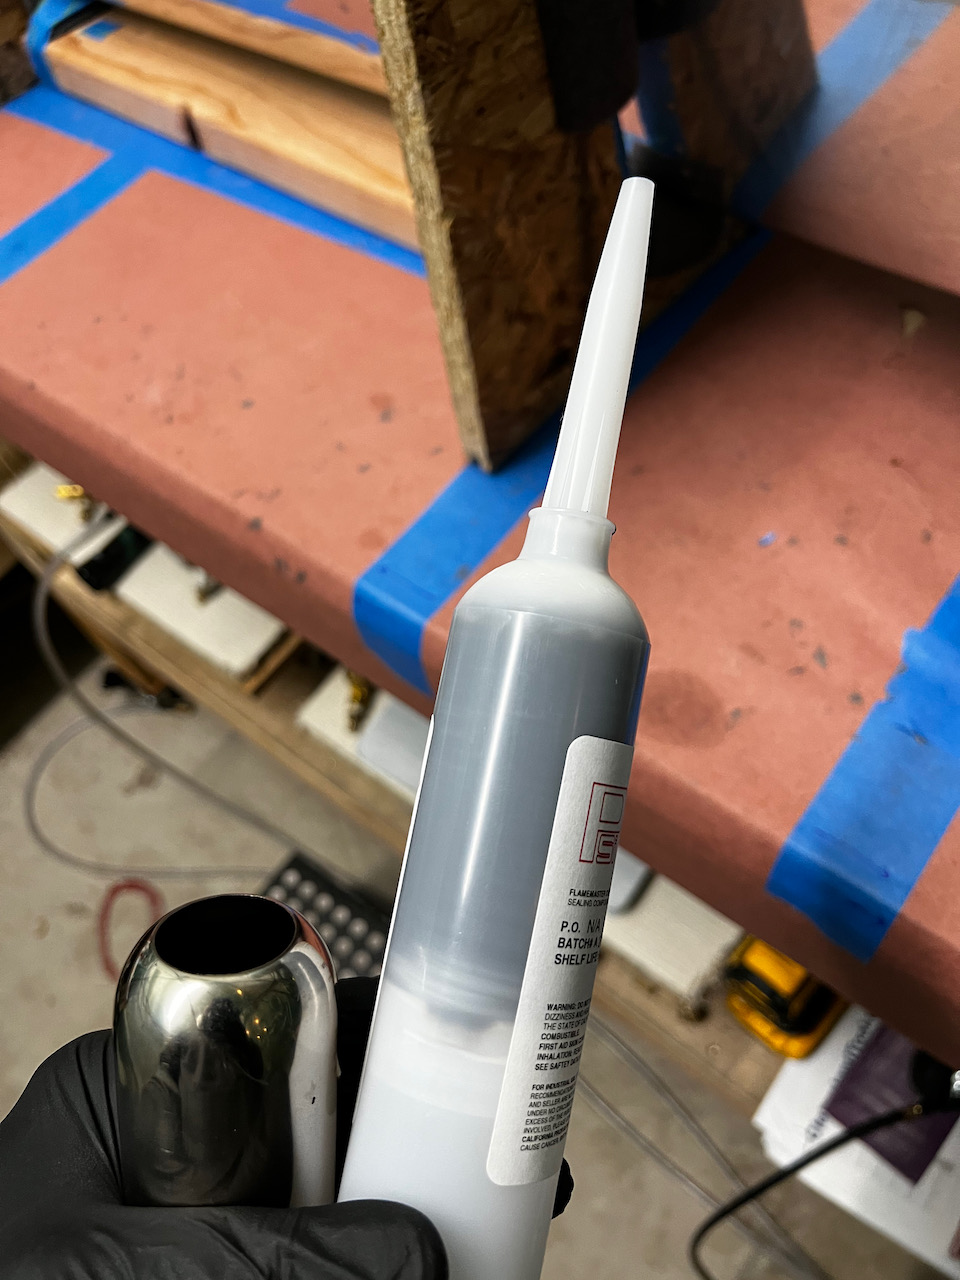
Next was using a version of sealant applicator that I hadn’t used yet. It is a pre-measured 3.5oz of sealant that you mix together using a special drill bit. Once mixed, you can use a caulking gun to dole out a clean bead of sealant. This is really important because you seal the baffle blind so having a clean and consistent bead to “squish” gives you the best chance for a clean seal. I went a step beyond the caulking gun, and got a pneumatic sealant applicator, which allows you to dispense very accurately with a push of a button. Since I had never used this type of gun before, I laid down a practice bead before starting on the tank. Let me tell you, this thing is SO COOL!!
Pre-Measured sealnt from Van’s Aircraft
Once you plunge the catalyst into the cavity, you mix using this special drill bit
All mixed up and ready to go!
Installed in the pneumatic sealant applicator
Beautiful practice bead!!
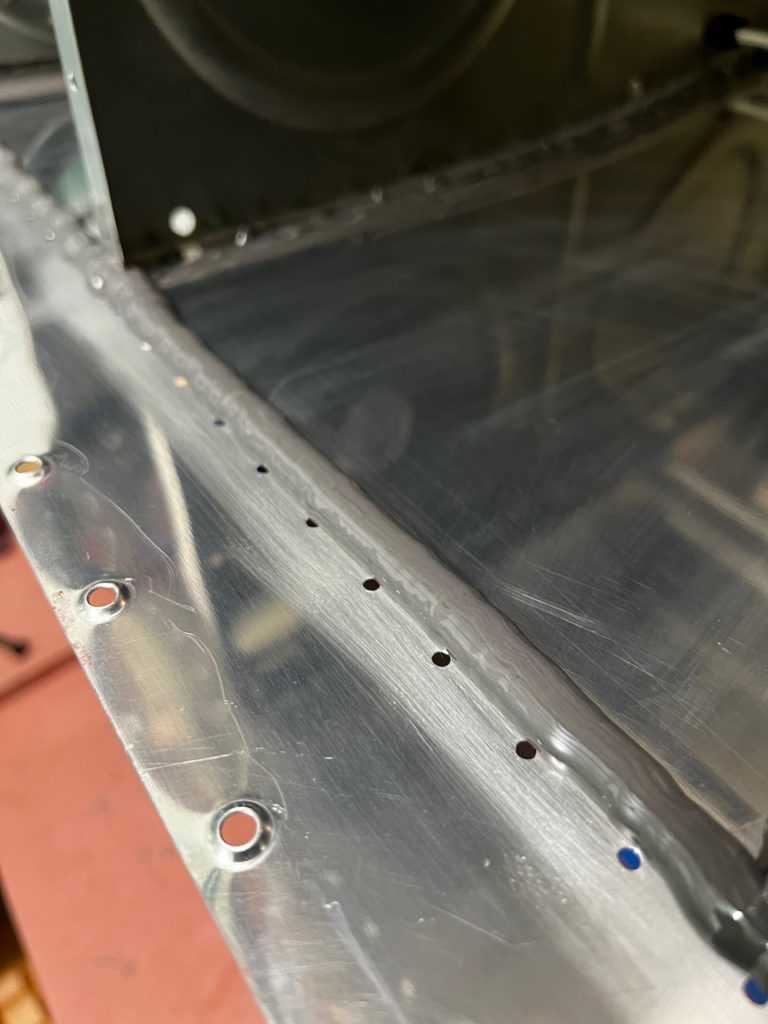
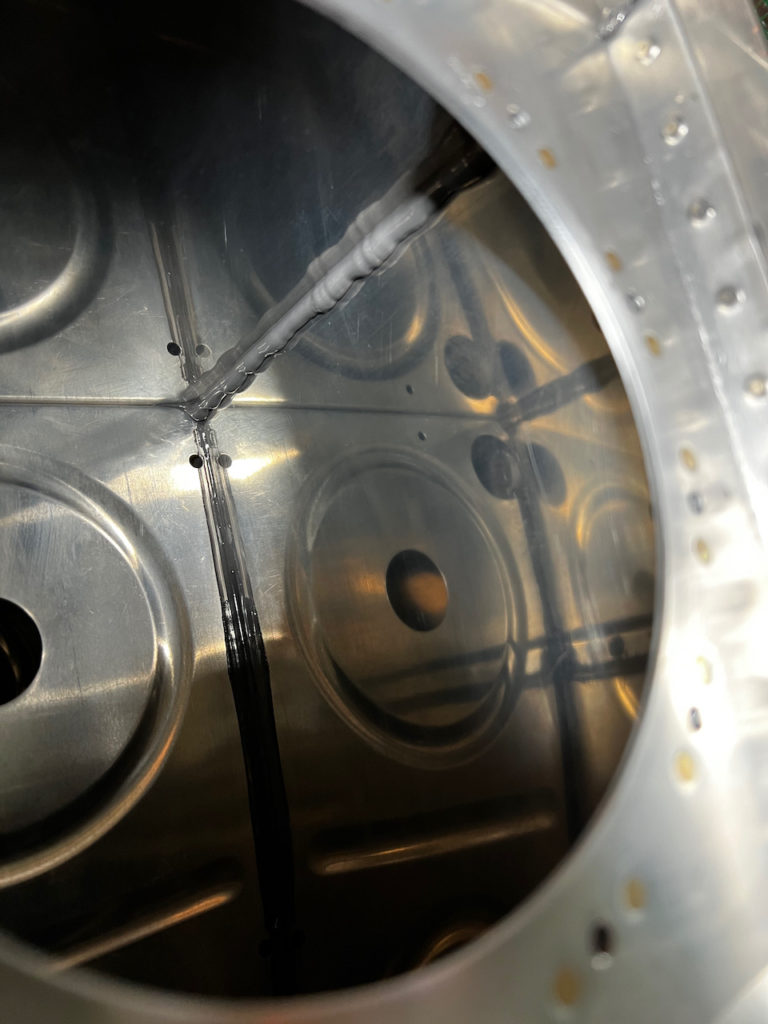
Before I put down the big bead for the baffle, I added slight smears of sealant on the top and bottom rivet holes of each of the inner rib rear flanges. These will be the only holes that don’t have brackets through them, so it’s the last chance I have to seal them. As in the video, I didn’t add a lot, since I’m only trying to seal around the hole. Then I laid down the bead that will seal the full length of the baffle. The idea is to put down a clean bead just inside of the rivet line of the baffle, and as the baffle gets put in, you “squish” the entire bead forward. It’s a fine balance between too close to (or over the) rivet line making it messy and not close enough which results in a poor mating of the two surfaces. With the pneumatic sealant gun ( some experience laying down caulk, this was a fairly quick job. In a few places I got a little close to the rivets (with the expected messiness that followed), and in general the bead could have been smaller, but I think the line was pretty good. I ended up using both of my 3.5oz containers, so I’ll need to order more for the right tank. Since I didn’t use all of the second container, I put it in the fridge to slow the curing process, in case I was able to get to the brackets (yes…foreshadowing on purpose).
no need to over do the sealant as 90% of it will get squeezed out.
all top and bottom holes ready for closure
bead of sealant cleanly laid down and reay for closure
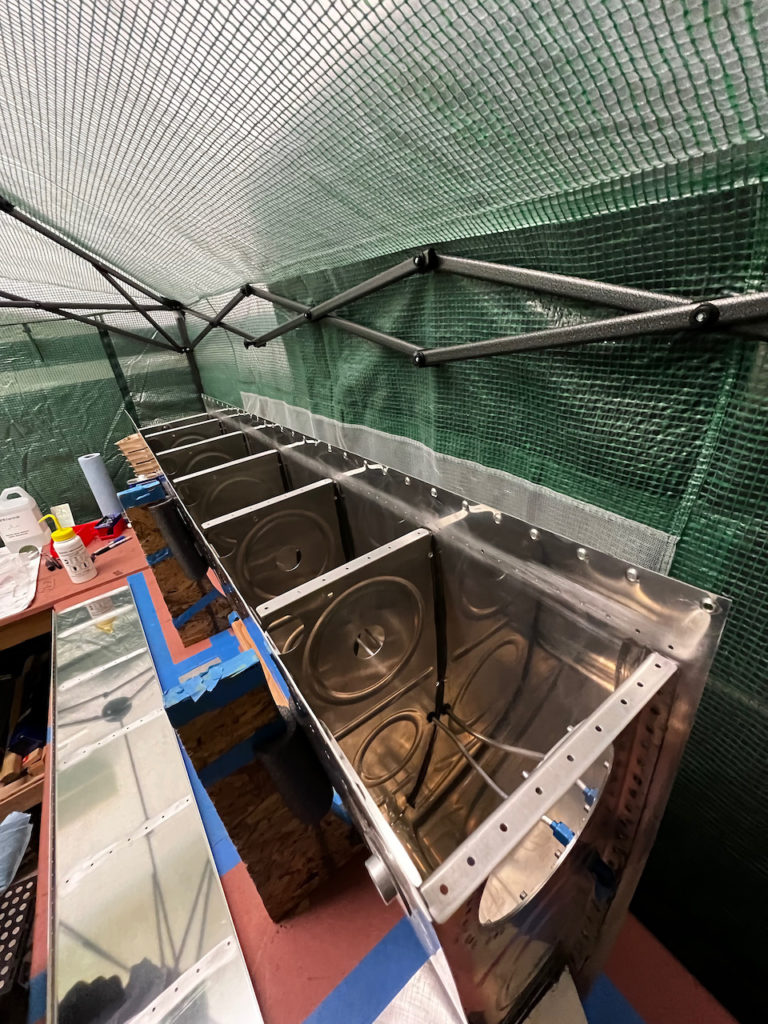
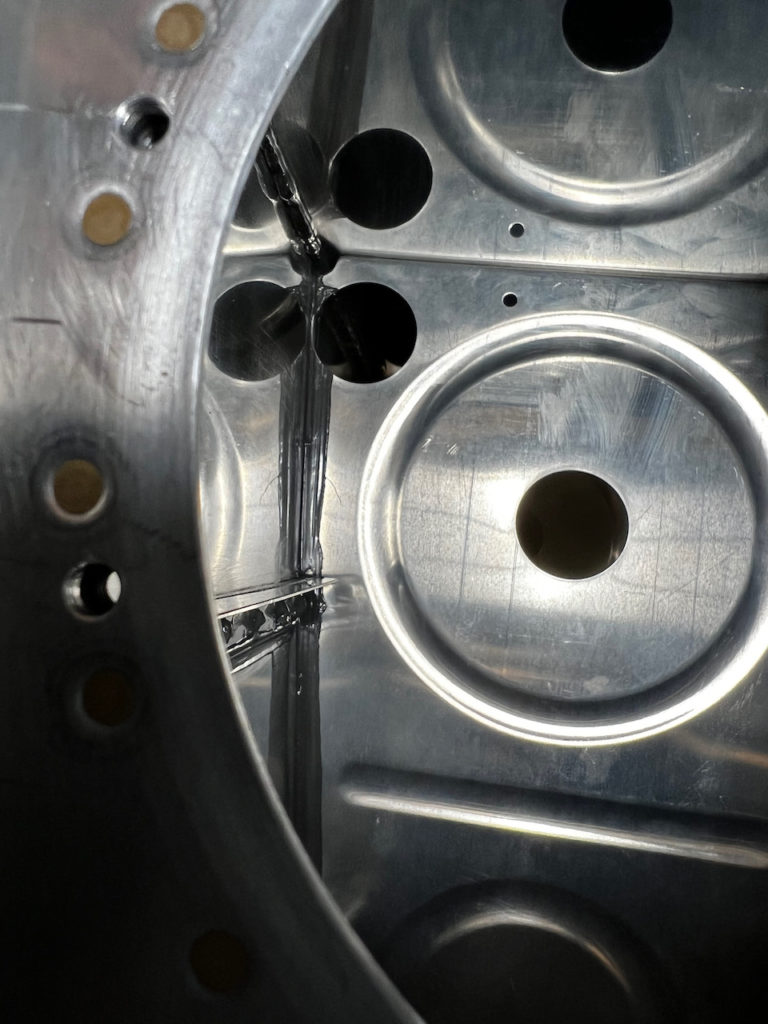
And then came the big close! Obviously not a lot of photos during that time but the photos below show the clean “squish” once the baffle was closed and cleco’d. All in all it went well. I think on the cleco’ing side, I would have liked to add more cleco’s on the skin to flange connection. The holes didn’t align that great as I added rivets, and caused a bit of stress and added time because of that. More clecos would have fixed that I presume.
nice squish across the bays I can see
still a good gap for fuel draining in the lower bead.
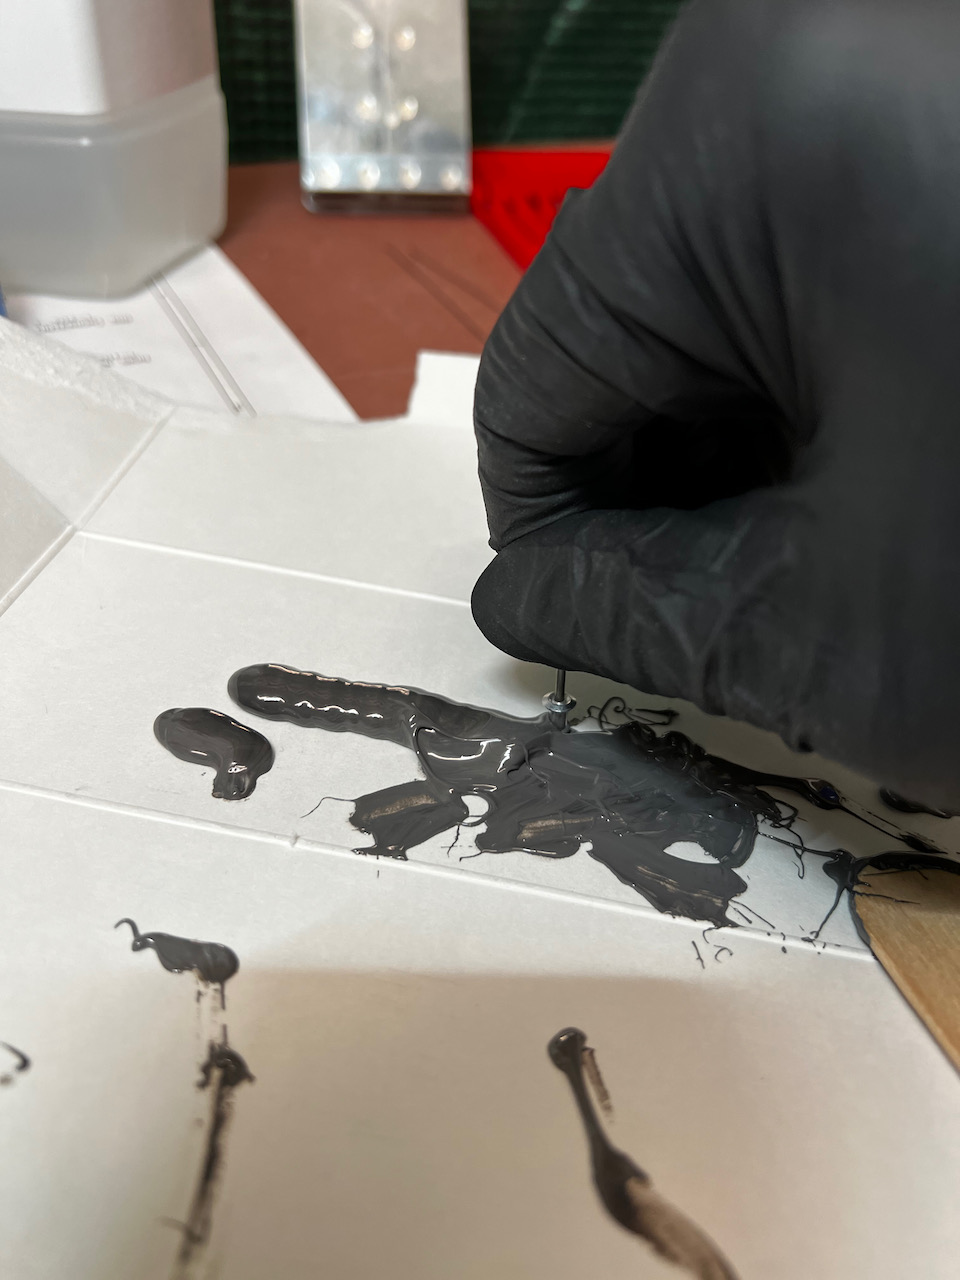
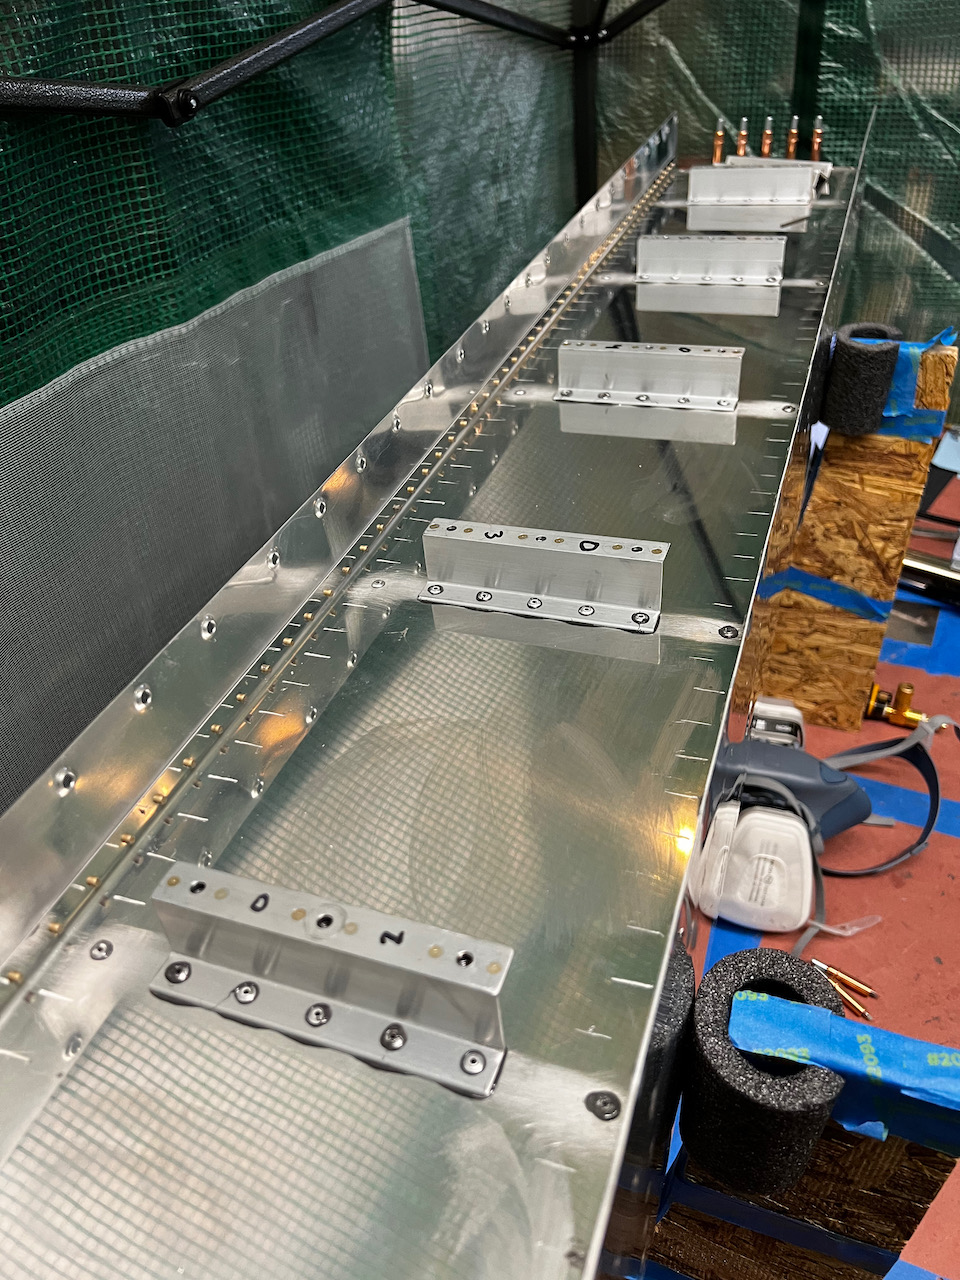
Once the baffle is closed up, the real work starts. I needed to pop rivet the top and bottom holes using the AD-41H pop rivets. They are special rivets that have no through hole (avoiding leaks), but you still need to twirl them in sealant before putting them in. This gives the final seal of these holes. By spinning the rivet as you insert them, you end up coating the entire rivet and adding a nice circumference of seal around the head. For the end ribs, you use AN470 rivets that can be squeezed. They also don’t need the sealant as they sit outside the sealant barrier. Once the rear flange rivets are in, then it’s a straight forward riveting job of the top and bottom skins. As noted above, more clecos would have made the rivet placement a lot easier since line up wasn’t great.
twirling instead of dipping the rivet minimzes excess sealant in areas that won’t help
nice sealant layer around the heads
all top and bottom pop rivets inserted and end ribs getting their AN470s
looking good!
some sealant sqeezed out, which doesn’t hurt, but it’s not necessary
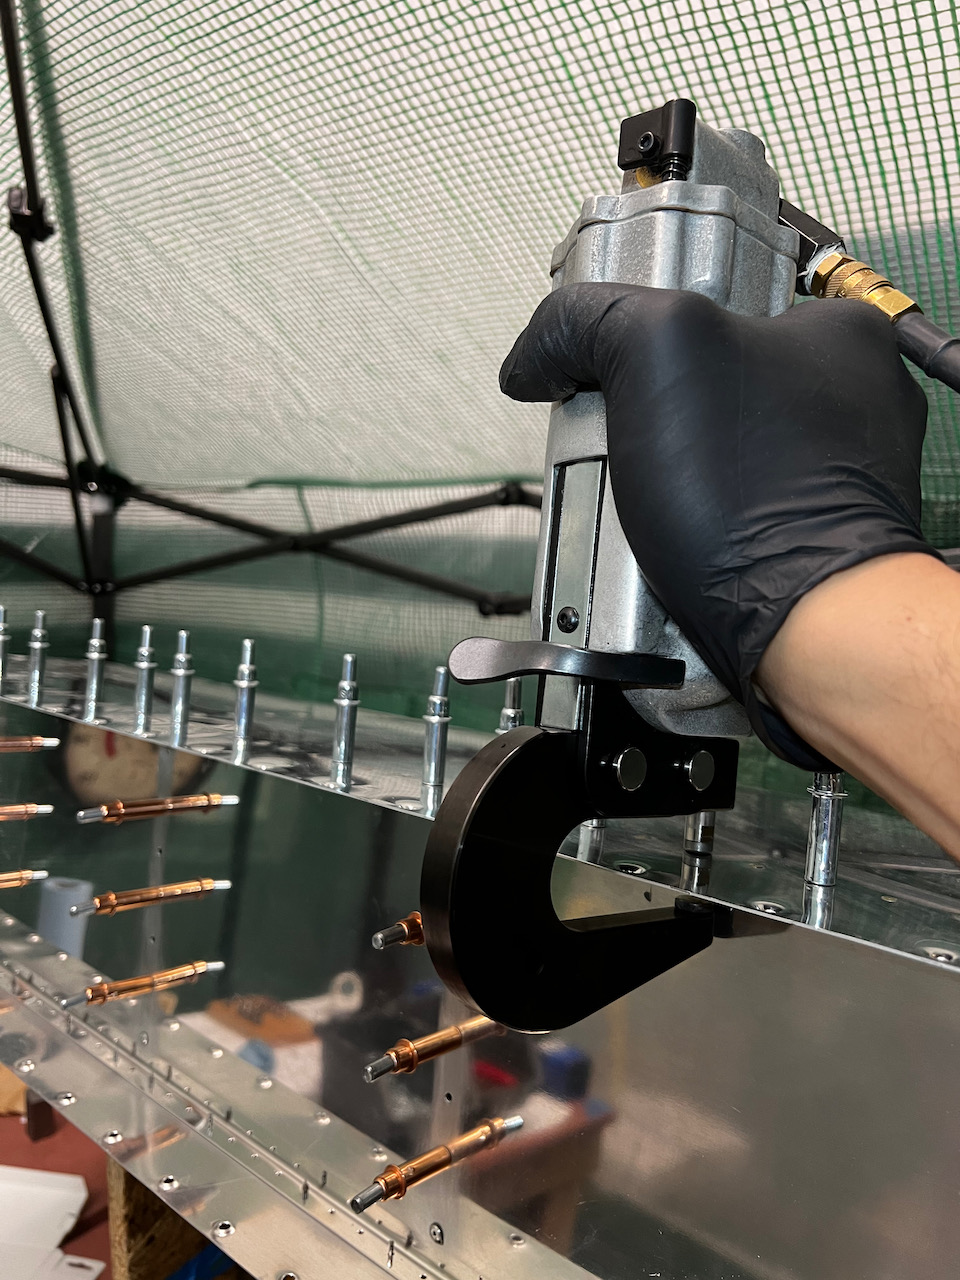
re-orienting the tank to allow easier squeezing
pneumatic squeezer to the rescue!
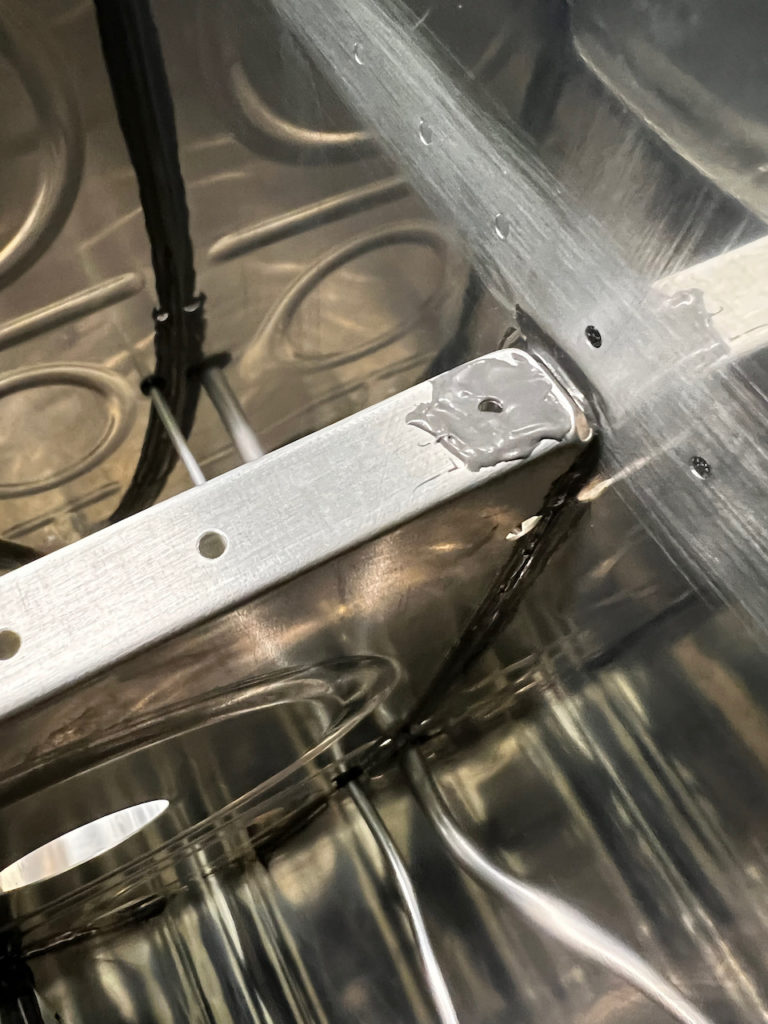
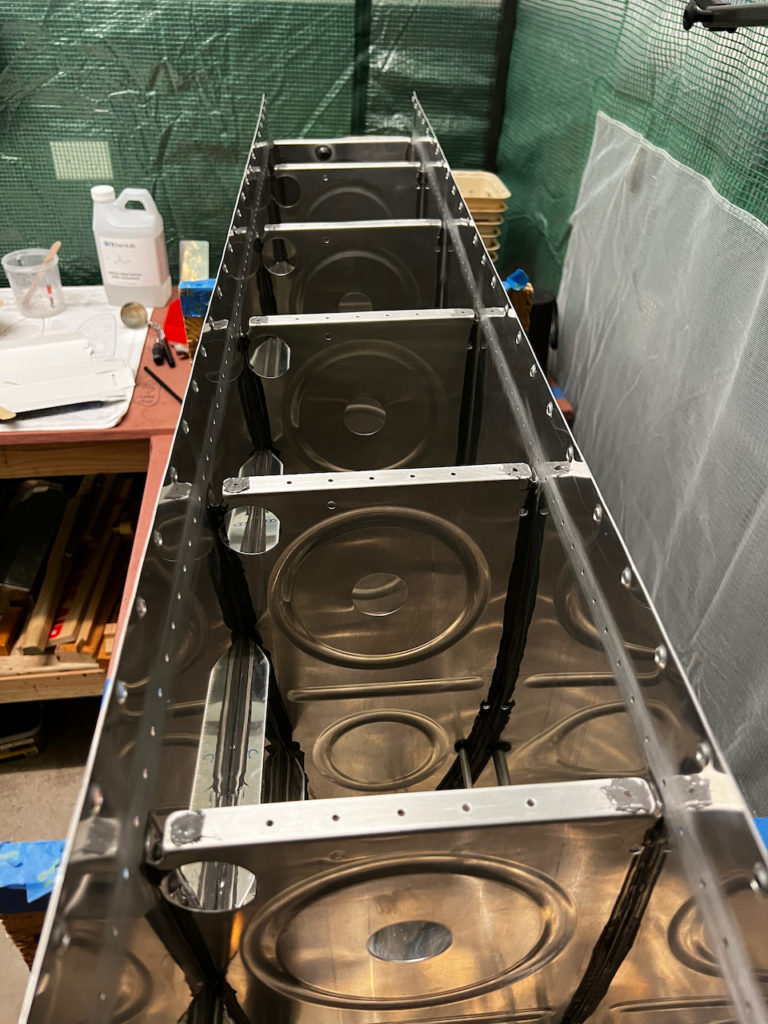
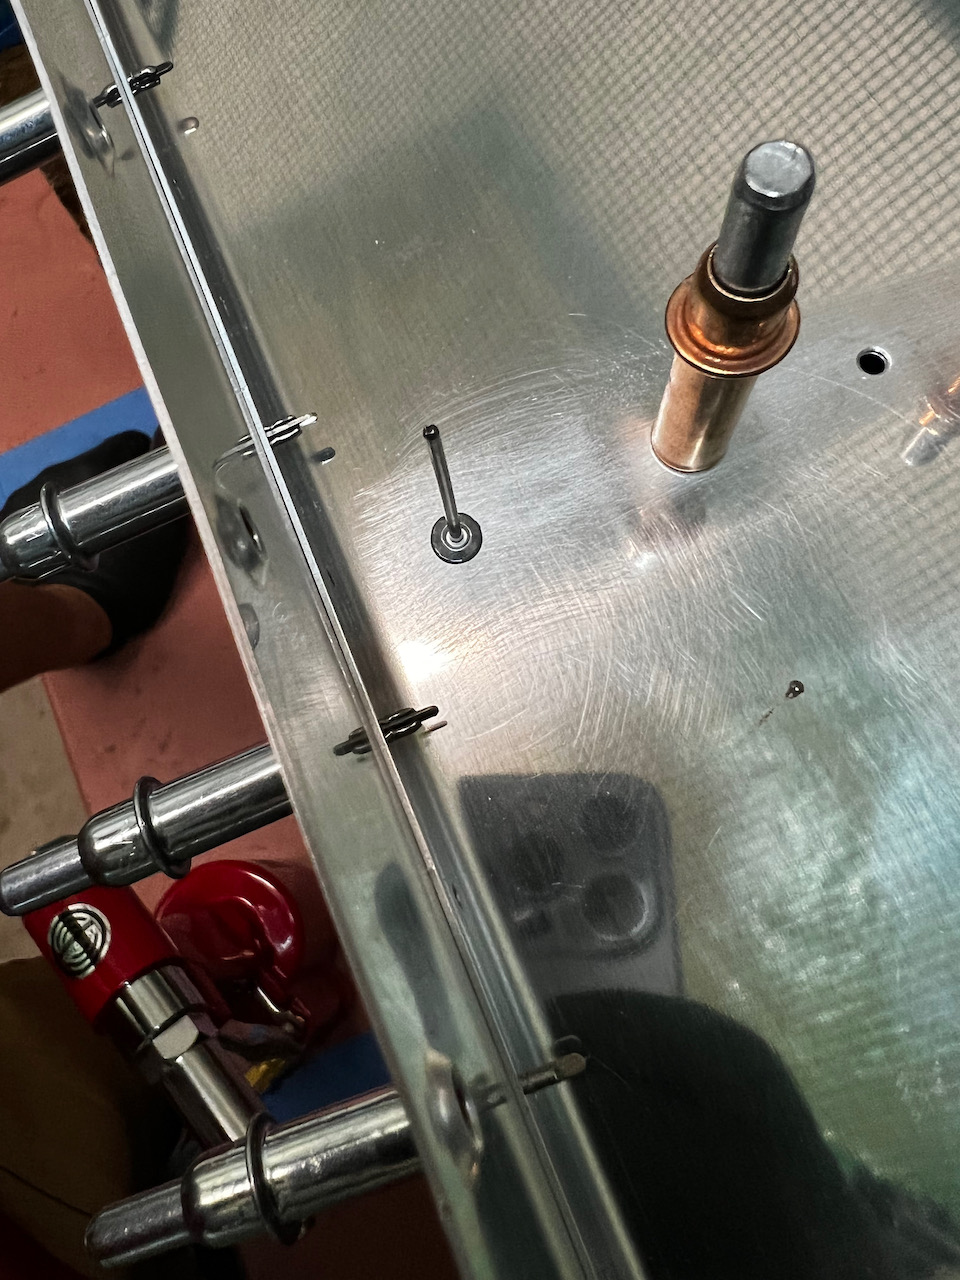
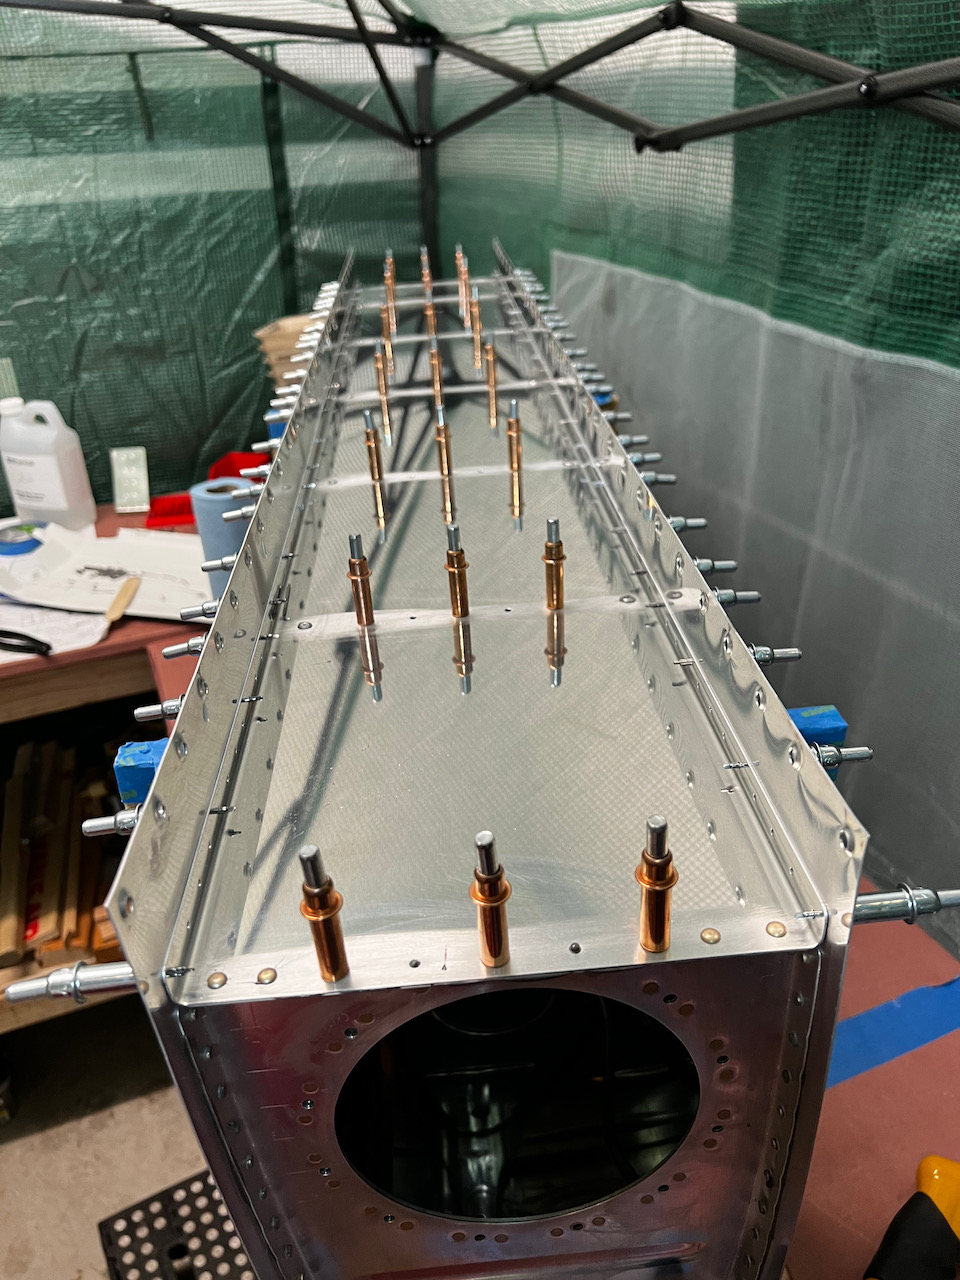
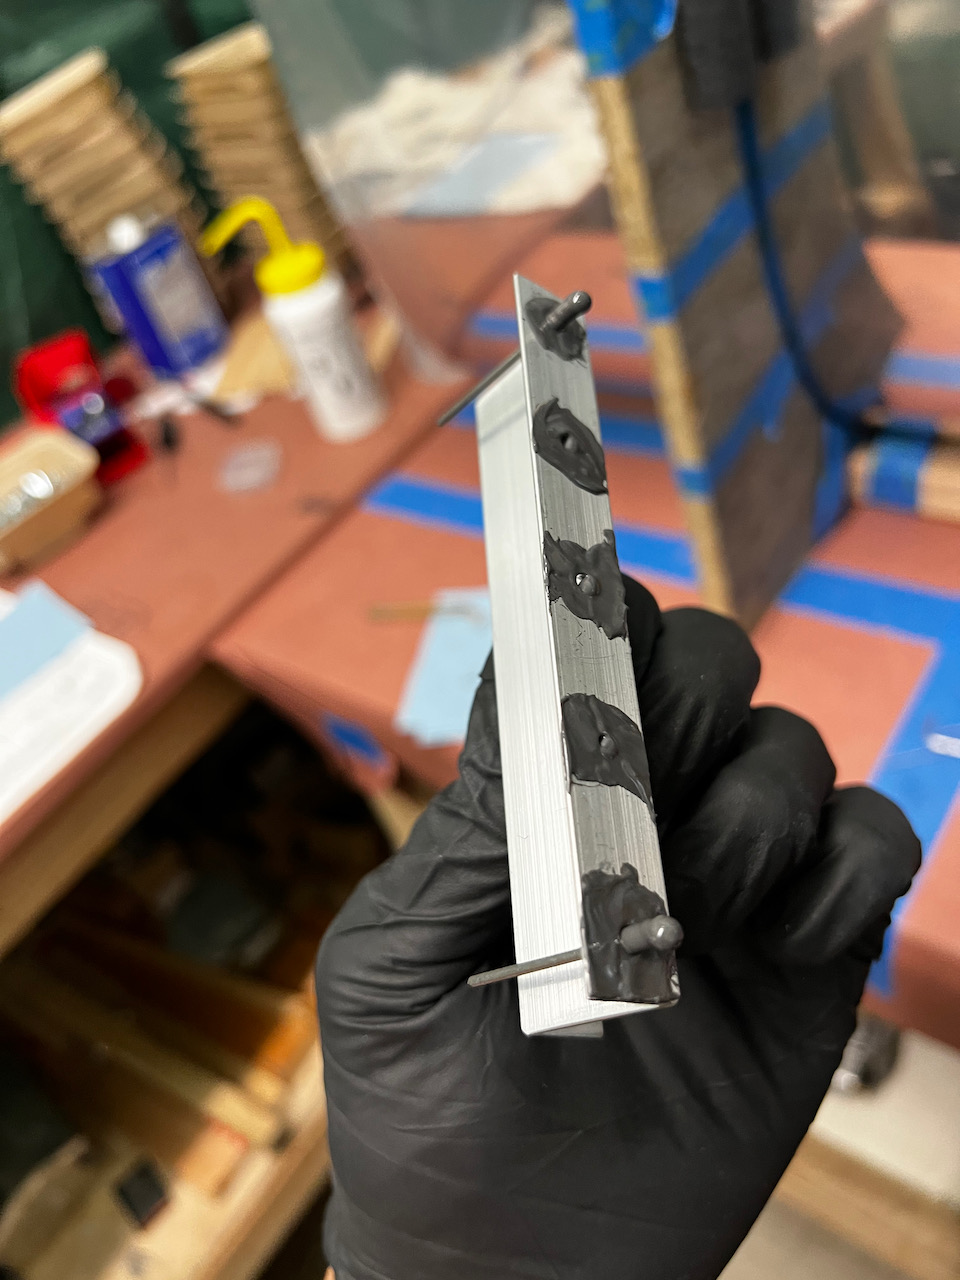
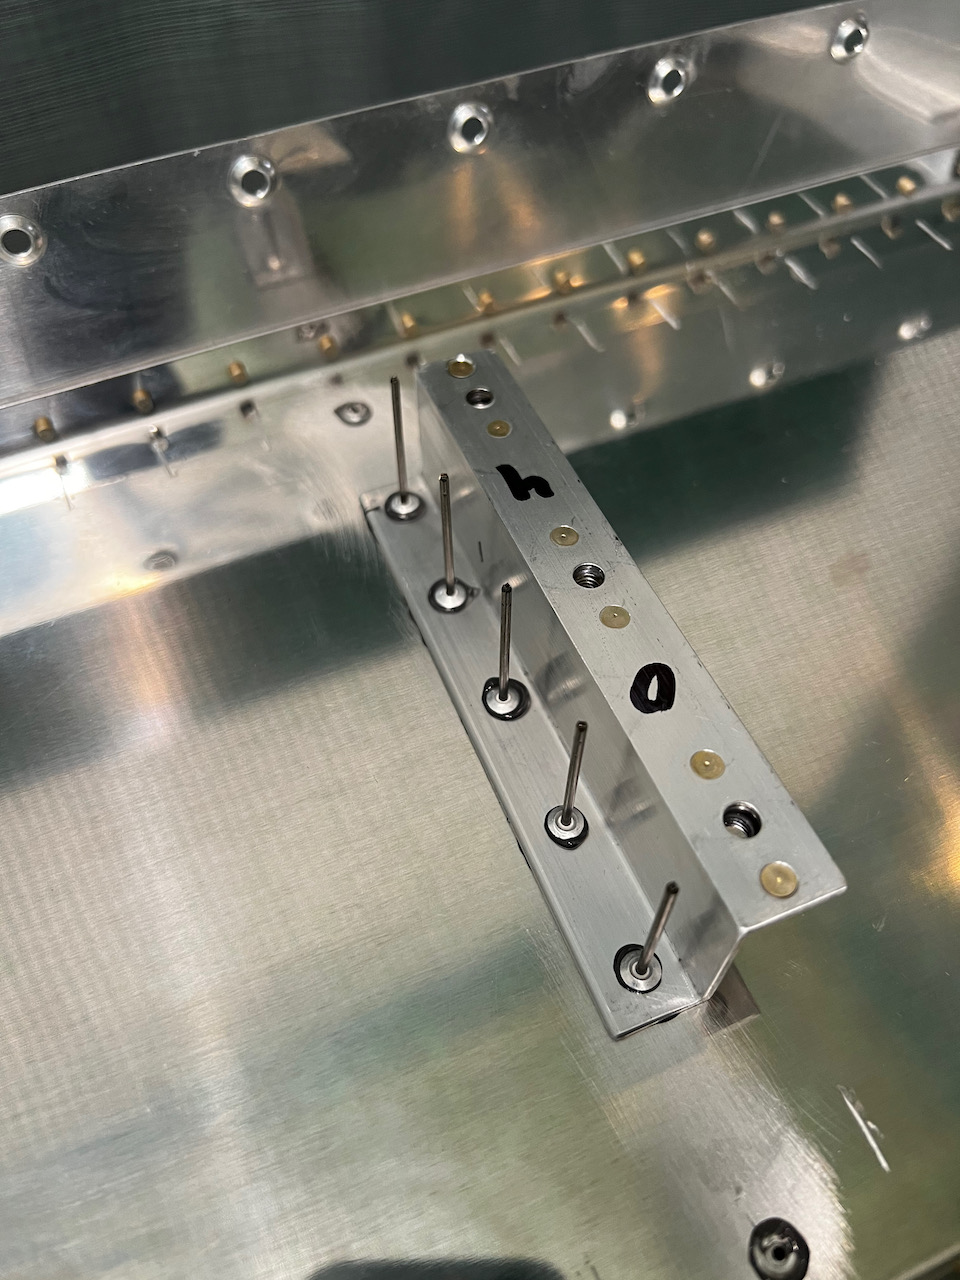
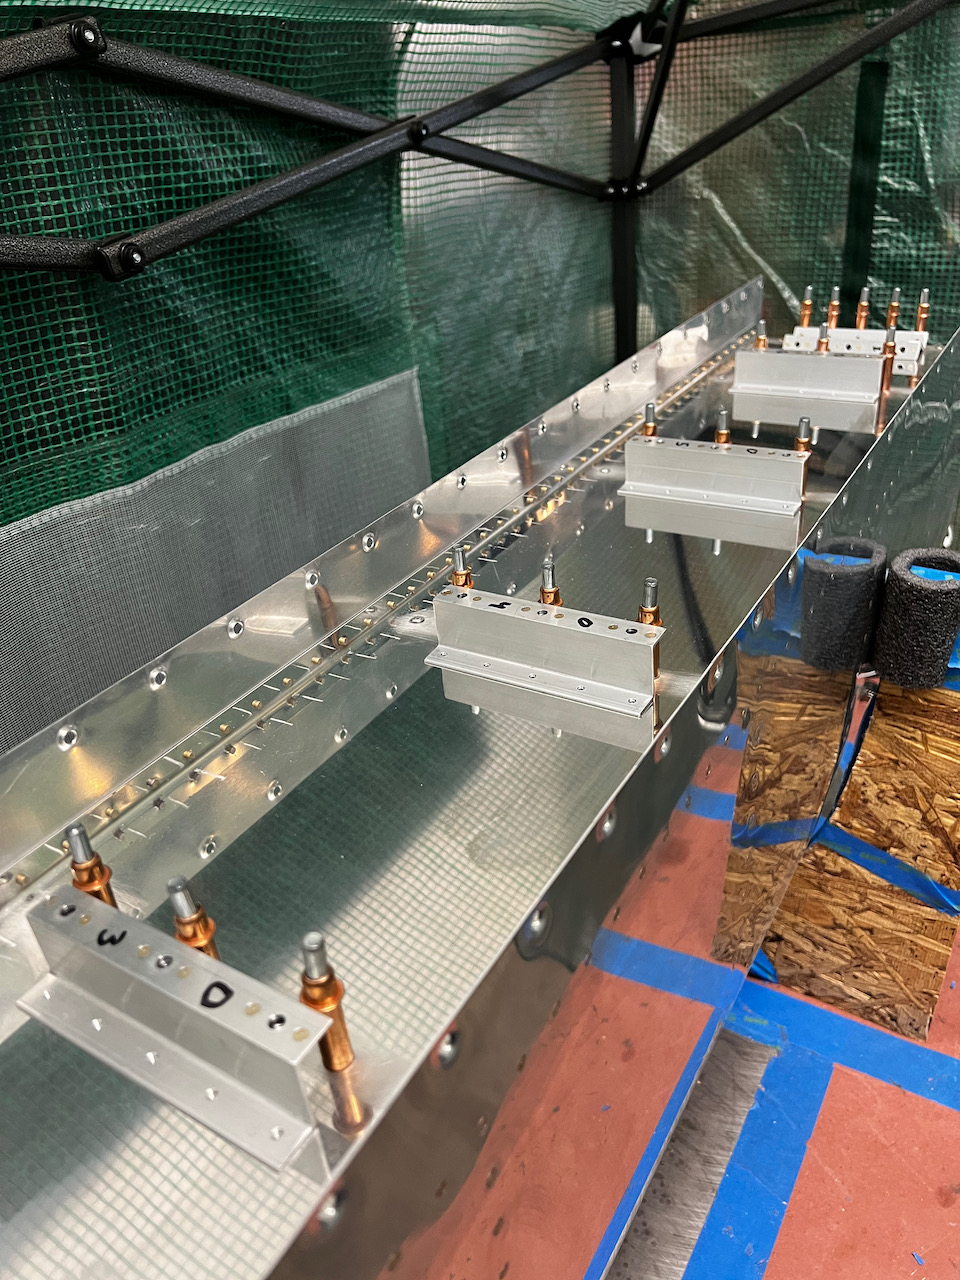
My assumption during planning was that the riveting was going to be the end of the session, but it turns out I was able to get all of that done in just a few hours. With the extra sealant in the fridge and a relatively smooth first part, I decided to move ahead and use the remaining time to install the tank bracket attach angles. The bracket’s pop rivets are similar to the ones previously installed (although a little longer… AD-42H) and required the same treatment of twirled sealant. Also, because of the tight angle to the bracket, I used a close quarter rivet pulling wedge to ensure that I got flat install of the rivets. Ensuring that the brackets were installed in the correct orientation was key, so I double checked twice, and used a tip from another builder’s blog: The two most outer brackets should face inboard, and the rest should face outboard. I marked the brackets “O” and “I” to remind myself.
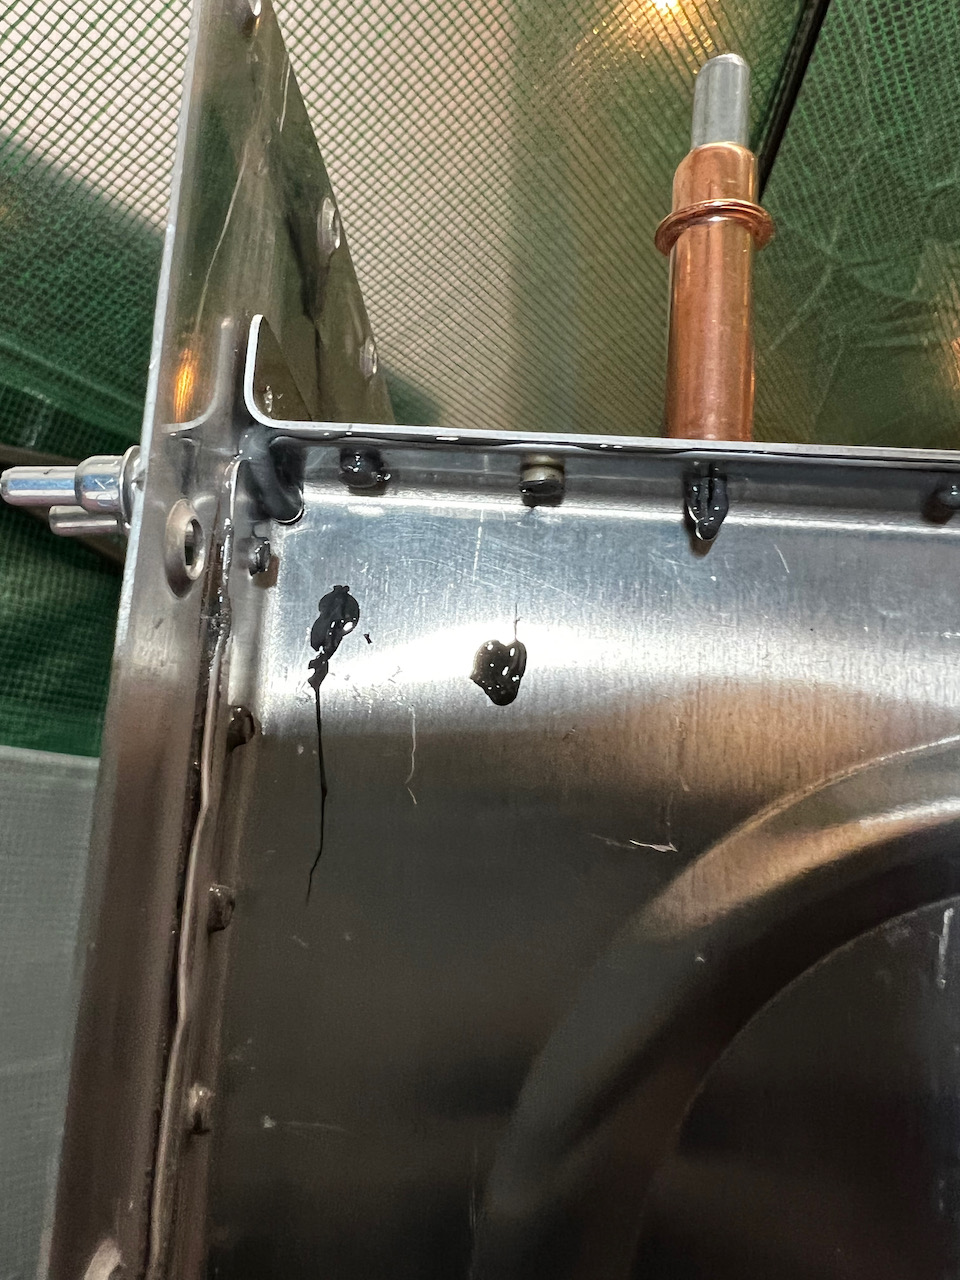
only enough sealant to seep out
close quarter rivet puller to ensure good seating when rivet is pulled
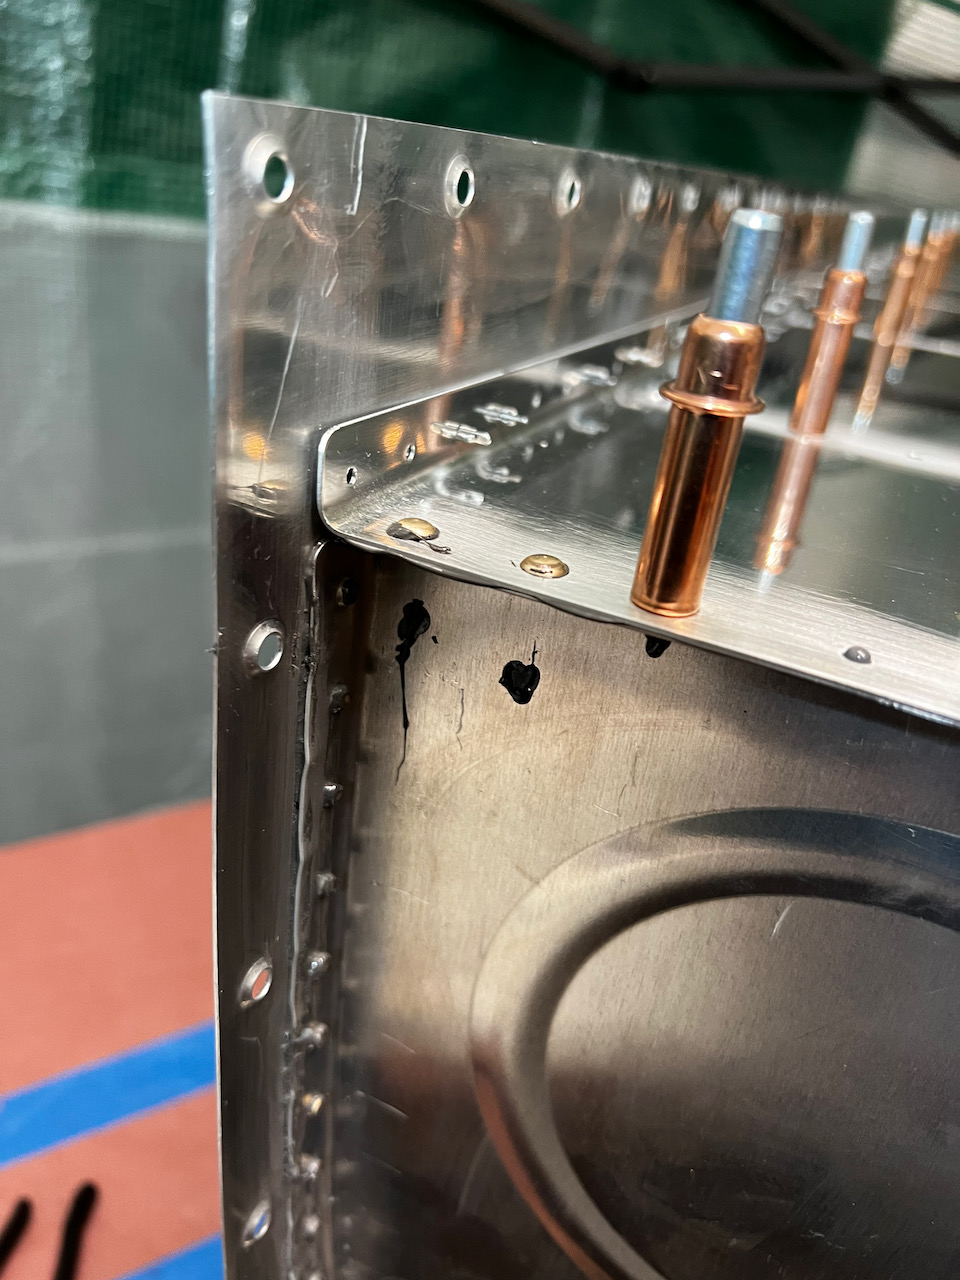
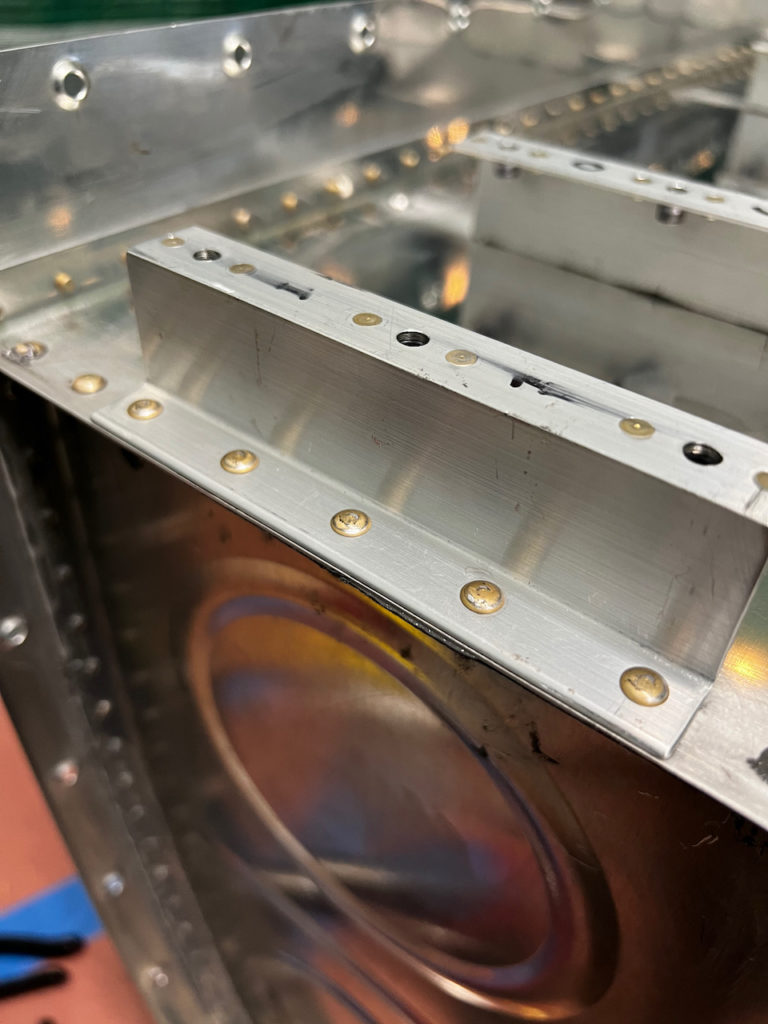
notice the sealant around the heads
marking the brackets helps make sure I orient them properly
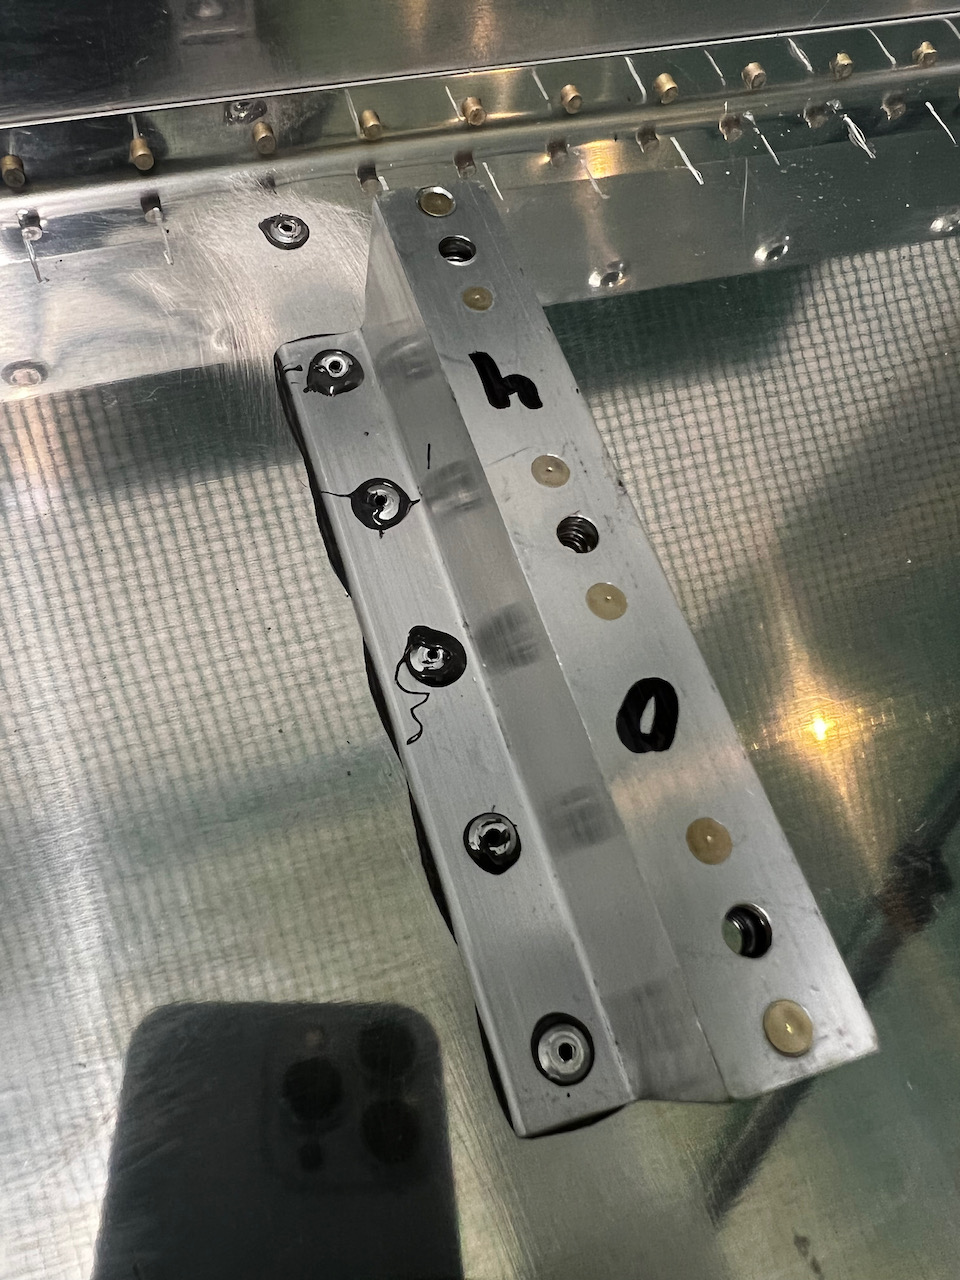
all done! Seepage is great.
marked and laid out for rivetting
With the brackets in, the stress of trying to get done before all the sealant became unworkable was over. The last item was to complete the end brackets which required AN470 rivets. Remember that these didn’t require sealant, so I was able to take a break before getting it done. Since the bracket got in the way of squeezing, these had to be done with a rivet gun and bucking bar.
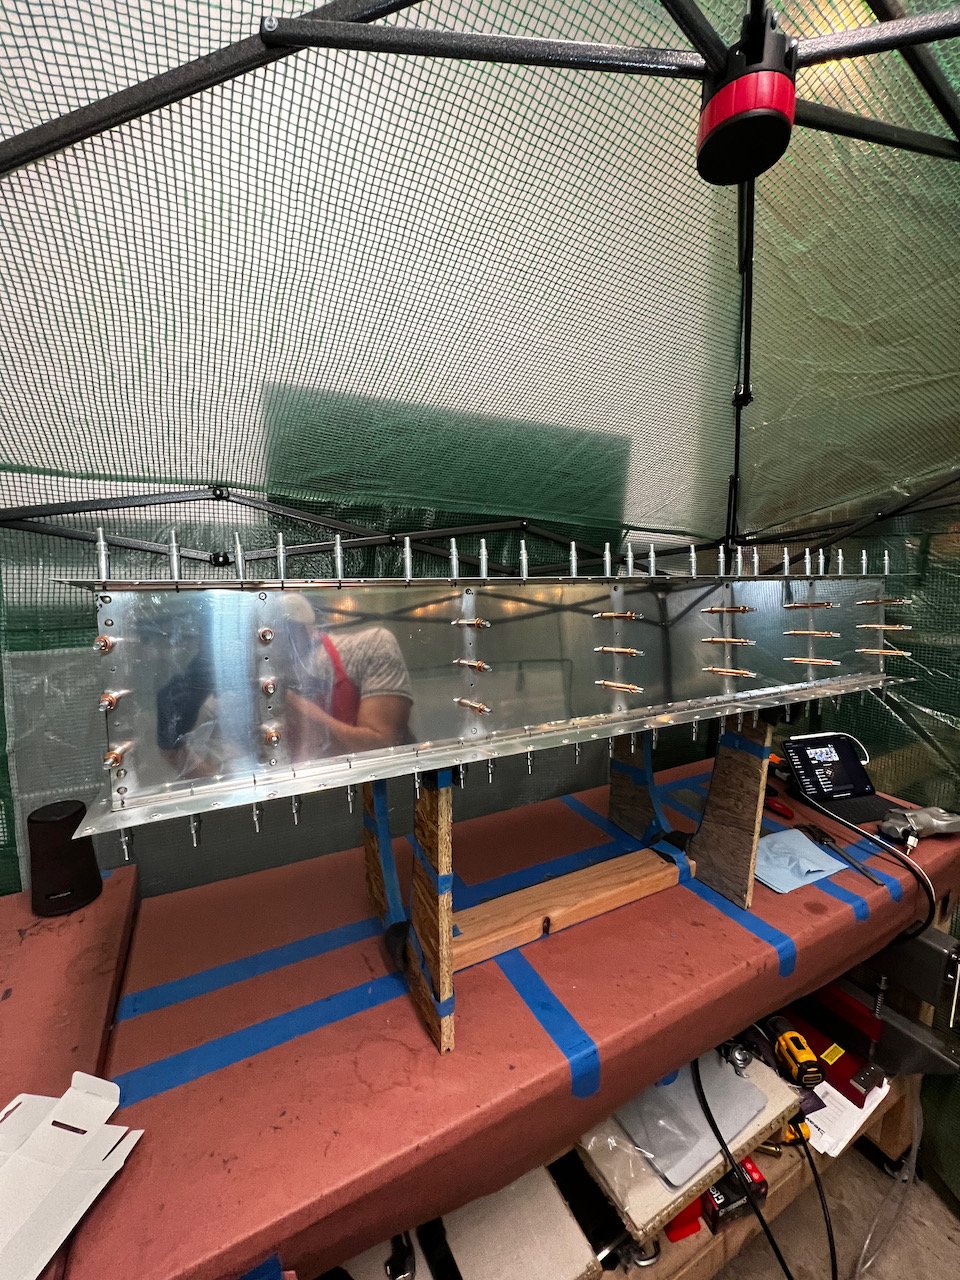
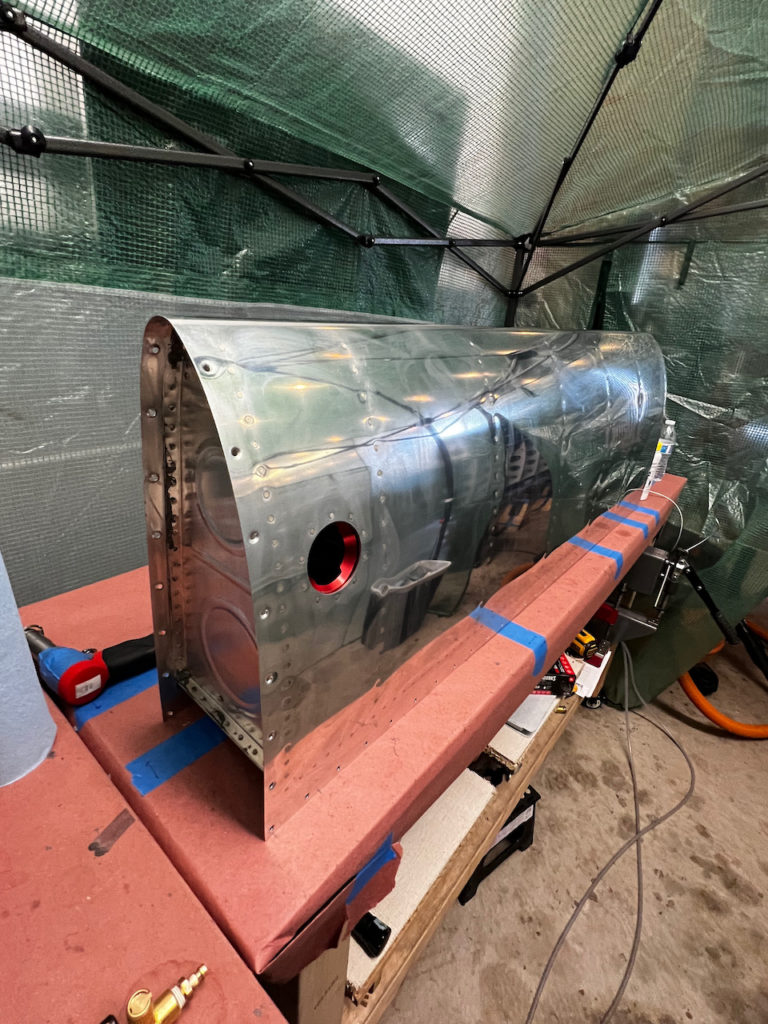
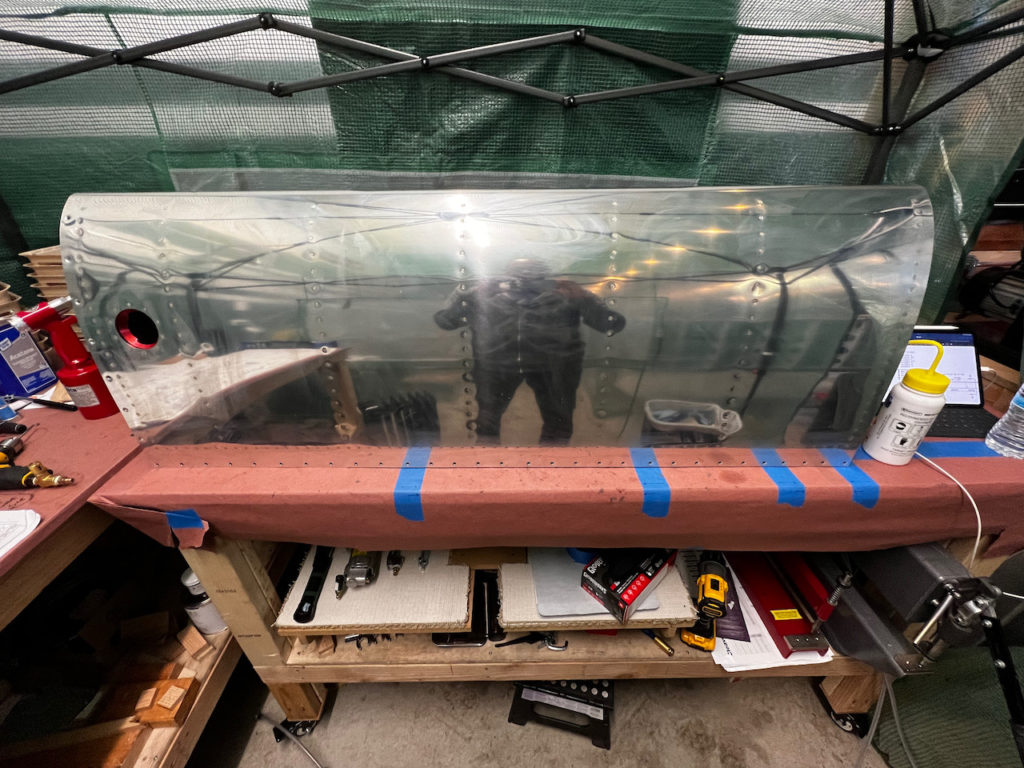
And with that the successful session was complete! Below are the finished pics. Since the sealant takes a couple of days to fully cure, there is still some “flow” occurring for some number of hours after the sealant sets up. Might as well use gravity to my advantage, so I set the tank on its rear to encourage flow back into the baffle seam. Sitting back I enjoyed a few minutes of satisfaction on a job well done (I hope!) What’s next? Well… for the left tank I really just need to wait. I will close out the access cover tomorrow (with sealant), and on Saturday will do a pressure test to validate my work. Let’s hope everything passes as repairs are a major pain in the butt. In the meantime, I will also work to get the right tank prepped for final baffle install…probably done on Sunday if the pressure test looks good (and the additional sealant arrives). Until then, Happy Building!!


3 comments
What a fruitful session. Nice work
Nice post. Helpful for me about to close out my tanks. Appreciate the hard work that goes into these posts
Thanks Scott! Good luck with your tank close out. Exciting… and nerve wracking day!